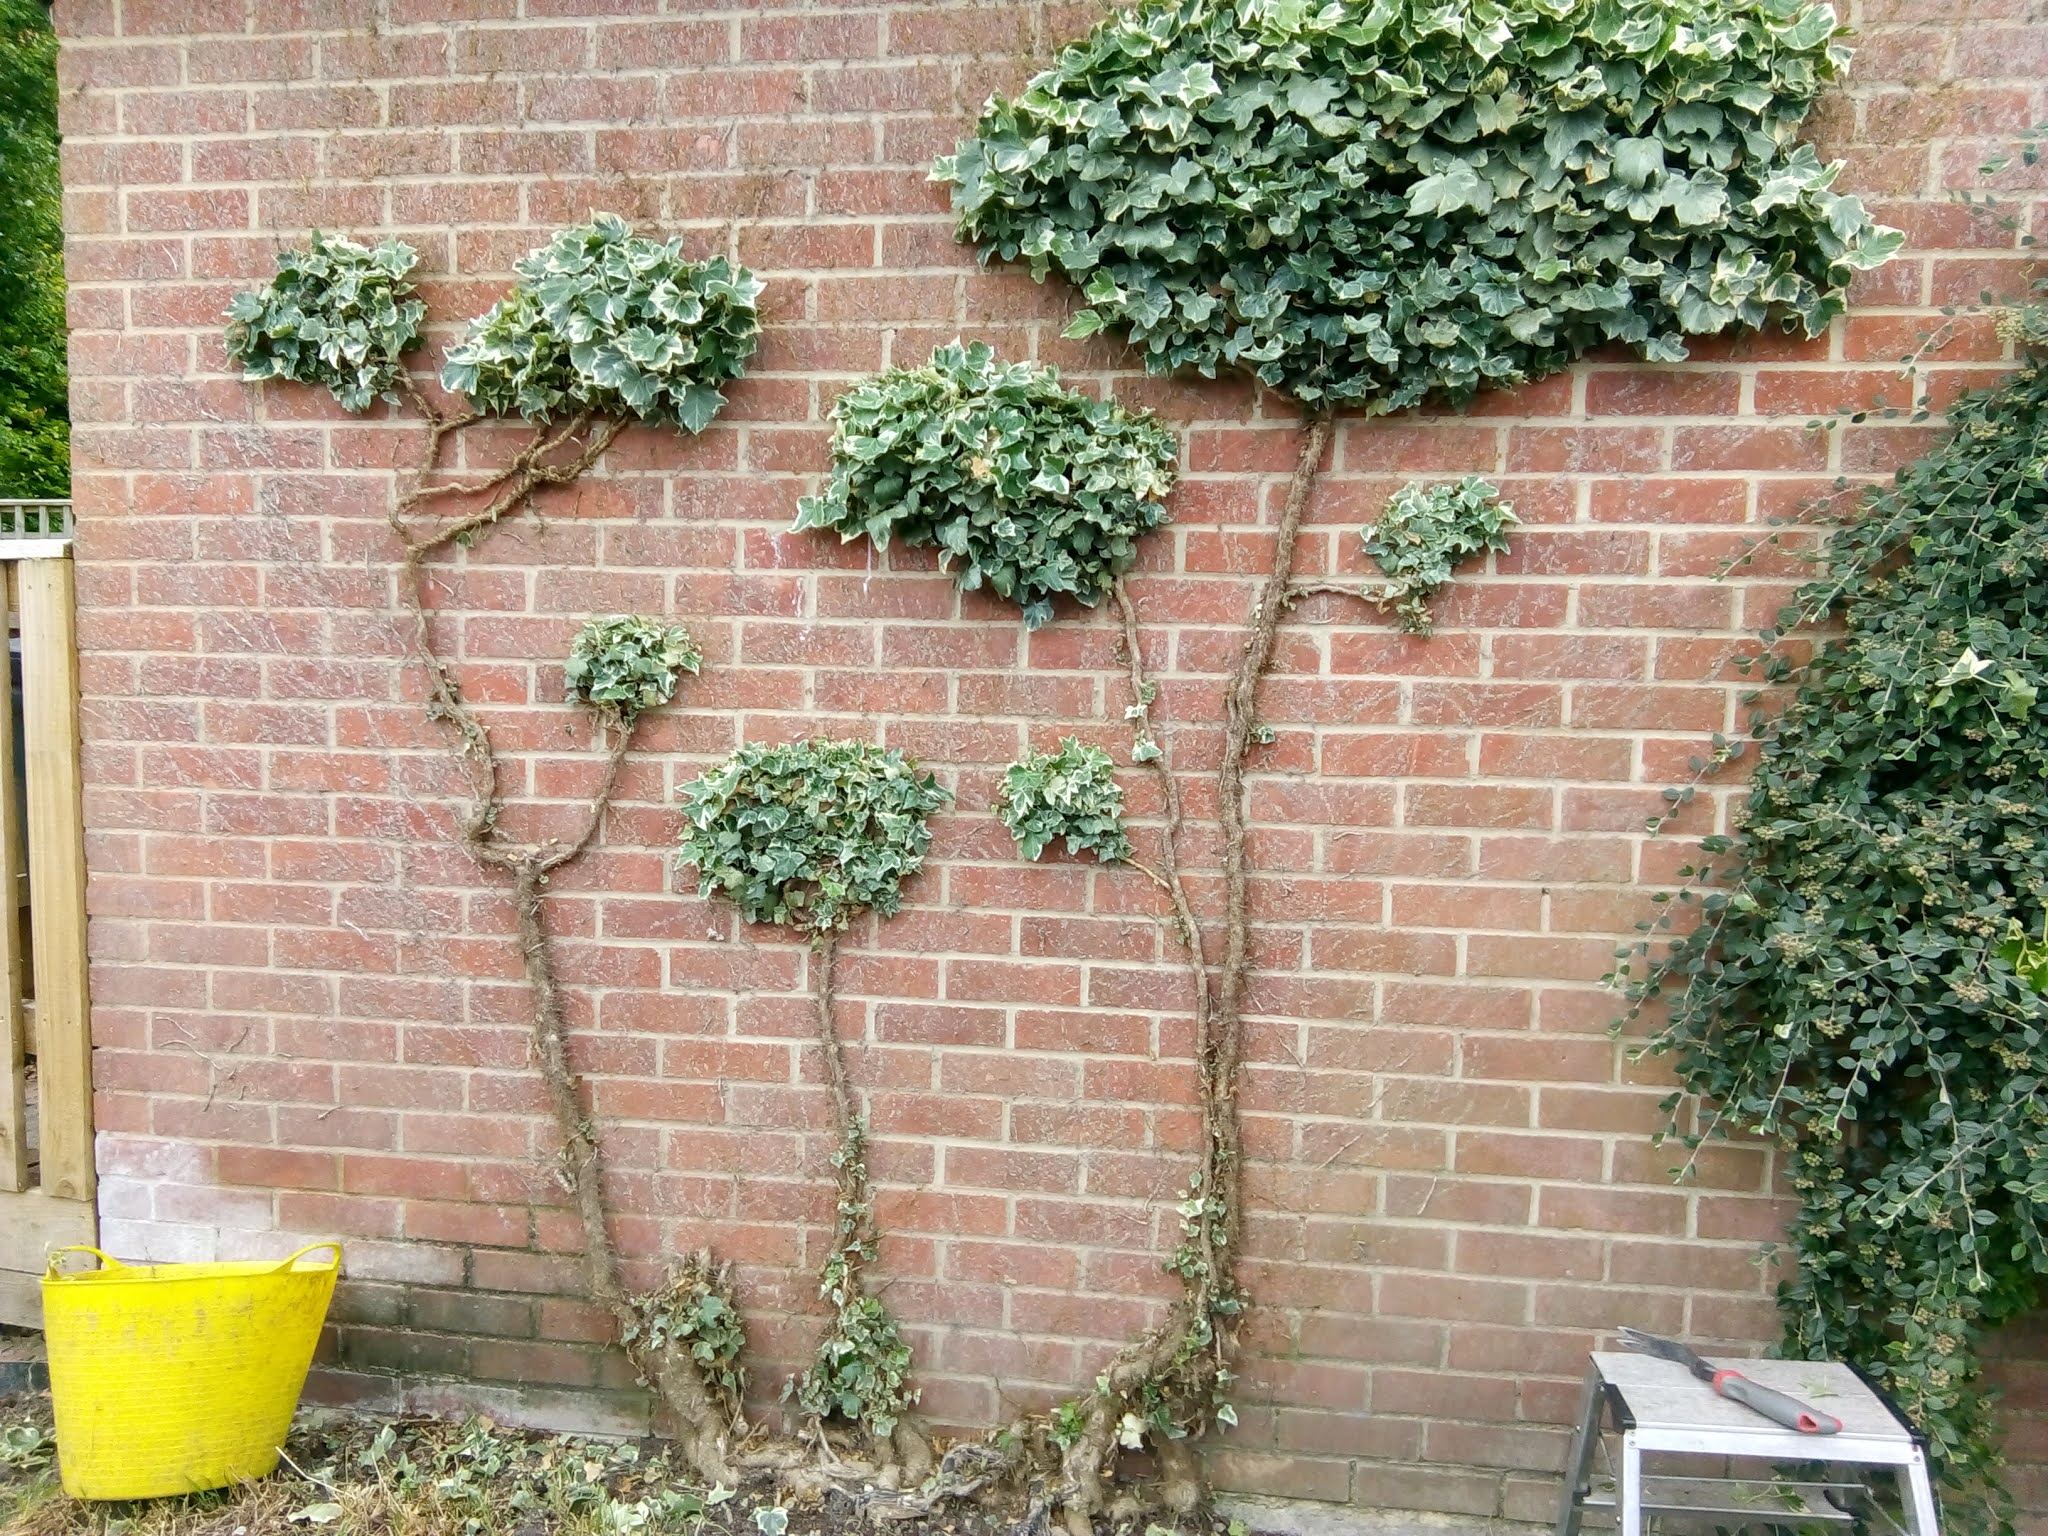
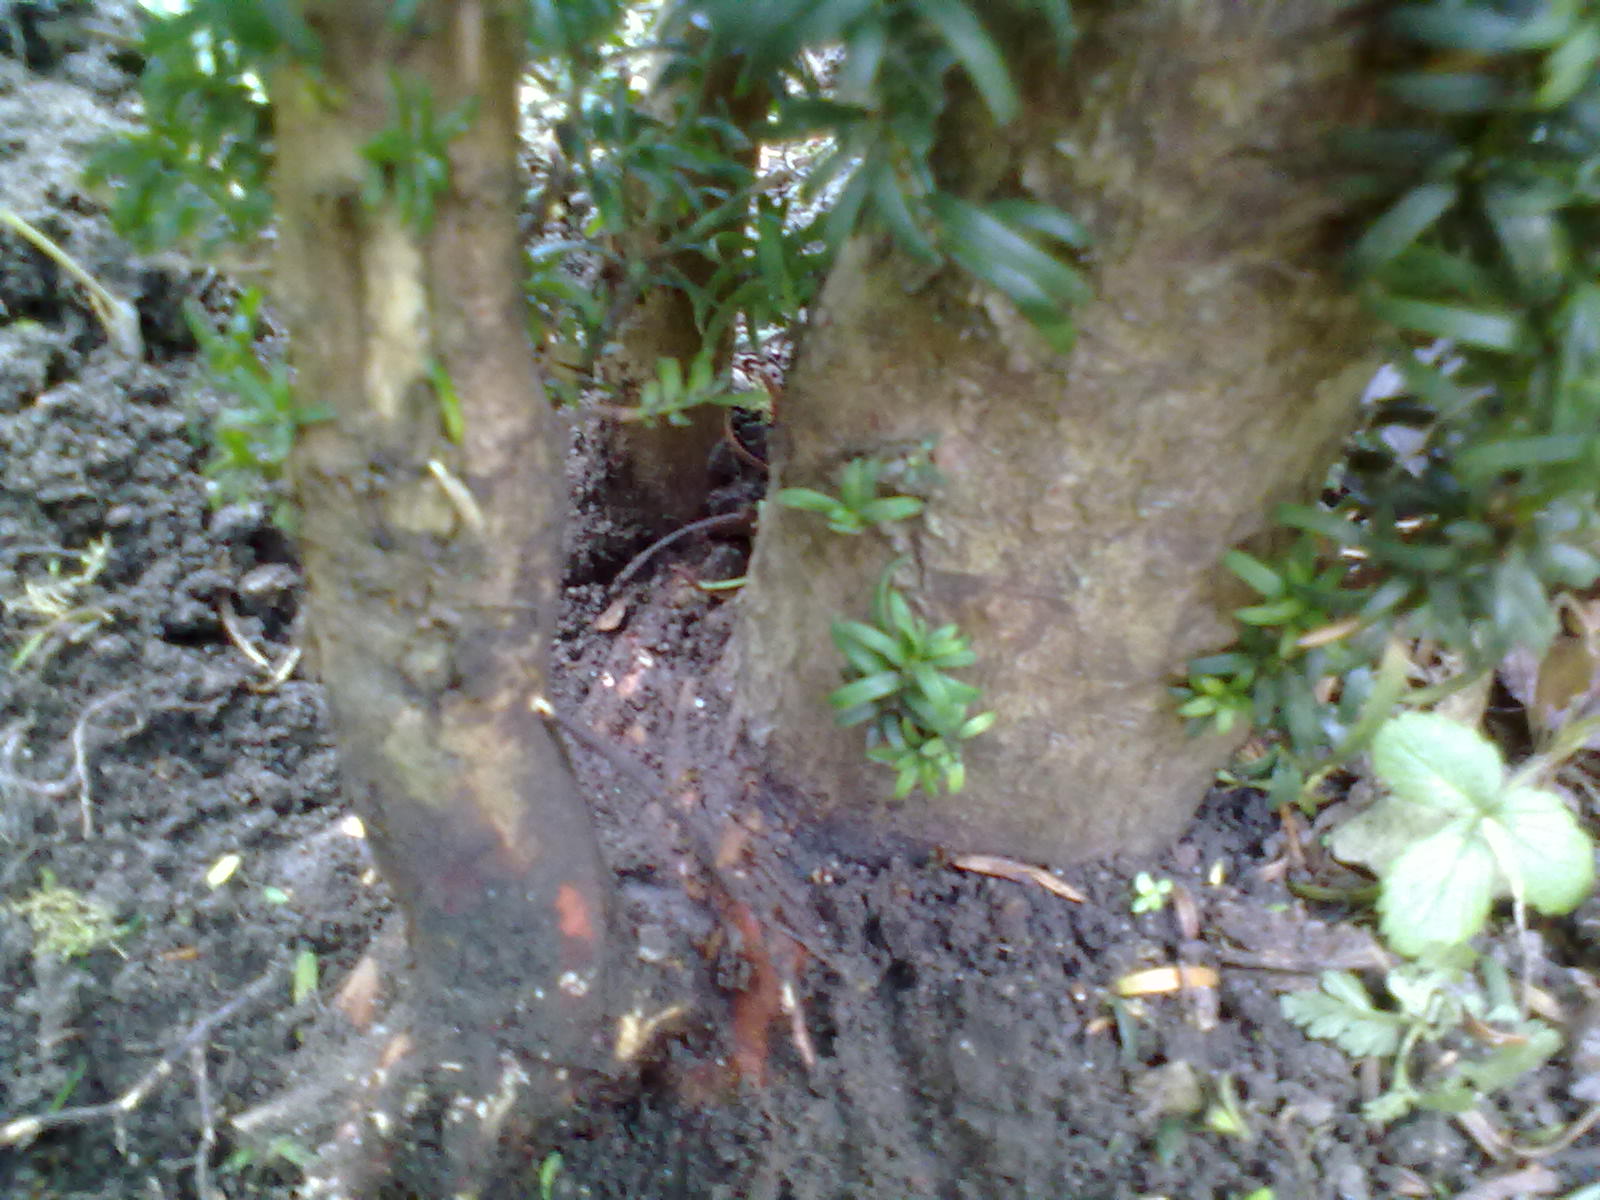
Showing posts with label Topiary. Show all posts

Sunday, 30 January 2022

There's nothing to do in winter, you say?

 People who don't have gardens often say that: "what do you DO with yourself in winter?" they ask, "when there's nothing to be done in the garden?"

*shakes head, sadly*

Ah, how little they know.

Among the long list of jobs which it IS possible - and often necessary - to do in winter, is the pruning of evergreen shrubs, which don't particularly mind being pruned in winter, and which we didn't get around to doing back in the summer...
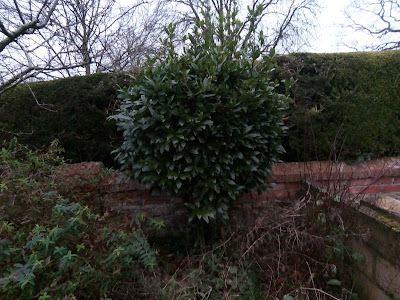
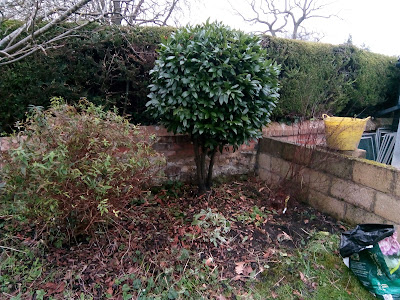
Here's a nice little job, for a cold winter's day: my Client asked me to tidy up this Bay multi-stemmed shrub, because she didn't want it getting any taller.

As you can see, it's throwing up long shoots at  the top, and what you probably can't see is that it's also putting up a lot of suckers from ground level, which are cluttering up the stems

There are also a few weeds and things around the base of it: this bed has apparently been a little bit neglected this year, so it needs a bit of tidying.

First job, then, is to do the weeding: otherwise I'll be standing on them in order to do the Bay, which will make it harder to weed them out afterwards.

They turned out to include some quite well-established nettles which required a bit of digging to extract: and I spotted quite a bit of bindweed towards the back of the bed, but I decided I'd come back to that on another day - I didn't want to dig too much, otherwise I'd get very muddy, plus it would "fluff up" the soil nicely, only to have it trampled down and compressed by me walking around the Bay.

Once the weeds were done, I found that the shrub to the left - 
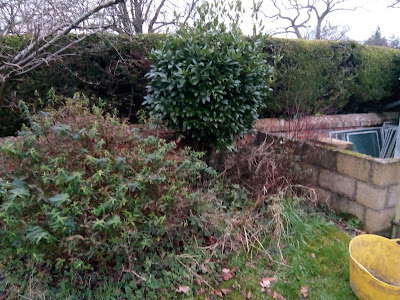
- a bulky and insignificant Hypericum (St John's Wort) - was getting in my way, and as it had no berries on it at all (highly unusual!) I gave it a quick all-round haircut.

I didn't bother with the usual one-in-three, because I could see - when I looked inside the bush - that it wasn't particularly congested inside, plus I could see where it had been cut the previous year, so I just trimmed it back lightly, and cut out some of the dead stems towards the centre.

This allowed me to get to the Bay, at last.

First job - nip off those over-long shoots. 

Simple enough, just go round it step by step, leaning in and up, taking each long stem in turn, and cutting them off with secateurs, but don't leave a stub sticking out: push the secateurs down well inside the "outline" of the top section.

Once they were dealt with, I went down on hands and knees, and cut out all the root suckers and shoots which were springing up from ground level. There were plenty of them, some as high as my waist!

In a perfect world, "one" would spot these new ground level shoots when they were still buds, and rub them off: this prevents them from growing. Having to cut the rather stout shoots off at ground level is "pruning", which means that the cut ends will sprout again in spring, so I will have to keep an eye on this shrub.

Next job,  I checked inside the top section, and found a patch of dead leaves, so I tracked those stems back and cut out the dead sections altogether.

This, predictably, left a hole or void, so I pulled some of the other branches in, to fill the gap, and trimmed them as necessary.

Nearly done: now it's time to stand back, and check the overall shape from all sides. Sure enough, I'd missed one of the top sprouts (every time!) so out that came, and then I felt that a couple of the lowest branches could do with a trim.
And there you go, all done.

You will note that the top of the Bay is not laser-clipped to an artificial smoothness: with large-leaved shrubs such as Bay, I much prefer the "natural" shaping, where individual leaves are not clipped with shears - partly because those clipped leaves then go brown where they were cut, which I think is really ugly.

And partly because I think it looks more natural, this way.

Next time, I'll go along the front of the bed and tidy up the newly-revealed grass edge, which has deteriorated considerably, as you can see.

But for today, that was enough, and the Client was happy!


Did you enjoy this article? Did you find it useful? Would you like me to answer your own, personal, gardening question? Become a Patron - just click here - and support me! Or use the Donate button for a one-off donation. If just 10% of my visitors gave me a pound a month, I'd be able to spend a lot more time answering all the questions!!

Saturday, 13 March 2021

Smiling Box Face - Update.

 A while ago, I wrote about creating a new piece of Box topiary, from a very ragged Box ball.

The Box plant in question had become very overgrown:


That's it, on the left, behind the Acer, whose branches appear to be being eaten by it.

Worse, it was so huge that people - and the wheelbarrow - could barely squeeze in between it, and the water butt.

This was very annoying for everyone, so my first job was to reduce it in size.

This is always a scary job, because you have to really hack into them, back into bare stems. It's always advisable to make sure the Client knows what you are about to do, and to reassure them that it will green up again!

Luckily, my Client trusts me, so this was the first stage - and now we are looking at it from the other side.

I did this - right - in June, and within a month, it had greened up quite nicely, although it took another year before it was a solid green ball again.

To be perfectly  honest with you, I rather forgot about it for a year or two, because now that it was no longer in the way... I just didn't particularly notice it!

But then last year, I looked at it again, and decided to do something interesting with it.

This particular garden has a swimming pool, and in summer there is a constant stream of young visitors coming to use the pool, and they enter the garden along the side passageway.

So they see this Box ball, on their way in.

Aha! I thought to myself. I'll do something amusing, to make the kids laugh.

So I re-cut it into a happy smiley face:

This - left - is what it looked like on the day I first clipped it, which was in March of last year.

Oh, and see that water butt on the right? The gap is now wide enough for the wheelbarrow, whereas before I started this project, the box was projecting well over the edge of the grass.

So you can see that I had to reduce it quite substantially, before I re-shaped it. 

And there it is, a happy smiley face.

Not bad, eh?

I left it to re-grow, and by mid-summer it was looking quite fluffy.

The problem, if you can call it that, with topiary is that you do have to keep on at it - you can't just cut it once, and that's it. You have to continually revisit it, with a little bit of secateur attention from time to time, and a full re-clip, usually twice a year.


Here we are in September of last year: just a couple of months after first clipping it, and now it's really starting to look quite well-defined.

Of course, 2020 was the year of Covid-19, so there weren't actually any visitors to the pool... which is a bit of shame, but at least it gave me time to develop this piece of topiary!


Did you enjoy this article? Did you find it useful? Would you like me to answer your own, personal, gardening question? Become a Patron - just click here - and support me! Or use the Donate button for a one-off donation. If just 10% of my visitors gave me a pound a month, I'd be able to spend a lot more time answering all the questions!!

Friday, 25 September 2020

Pyracantha: how to get it covered in flowers

 I have a love-hate relationship with Pyracantha, or Firethorn, as it is known: I love the look of it, but hate working with it...

.. because it is covered in lethally sharp spikes... before you ask.

I was asked recently, by a neighbour of one of my Clients, how they could get their Pyracantha to flower as much as "ours" does - I had no idea that they were seething in  envy, every time they walked past, mwah haa haaa! (*maniacal laugh*)

The answer is deceptively simple - Pyracantha is one of those few garden shrubs which respond to pruning by flowering more and more: it seems counter-intuitive, but honestly, the more you prune it, the more flowers - and therefore berries - you will have.

To get the best from a Pyracantha, then, you need to grow it in a situation where you can prune it easily, ie not tucked away at the back of a border: I love them when they are espaliered along a fence or wall, trained to wires and cut back hard.

Here's one I trained up, a few years back when I'd just started it:

This is what they look like in May - you can see that the main branch, which is firmly tied in to stout wires on the wall, has flower buds on it, but it also has a lot of non-flowering new growth: these are the spindly bits, which are sticking out.

These all have to be pruned off, very close to the main framework: they don't bear flowers, and they just clutter up the design, and obscure the flowers on the main branches.

Plus, they make it very difficult to get close enough to prune it!

This is what most people struggle with: they want lots of flowers, so they assume they have to have lots of growth.

Wrong!

The trick, if you can call it that, is to be completely hard-hearted, and to go round several times a year, trimming off all the new growth. Yes, I know that you want a thick, bushy plant that is covered in flowers, but trust me, you won't get one, if you just let it grow and grow.

On the example above, I trimmed off all those skinny little new branches, back in May, again in mid summer, and again in autumn.

One year later, it looked like this:

There you go, thick lush growth all covered in flowers, which will, of course, turn into brightly coloured berries later in the year.

If I'd left it unpruned, it would be a mass of spiky green shoots, and you would barely be able to see the flowers.

And, of course, the path would be half the width that it is now!

How hard can you prune them? Well, you can quite literally allow just one single branch to grow: here's one of the upright sections of this same plant:

As you can see, one single branch has been allowed to grow upwards, and then one single branch has been allowed to grow out sideways along each of the wires, and I pruned them three times the previous year, to remove all fresh growth.

Here we are in May again, covered in flowers.

Over the next year or two, those three horizontal branches will thicken up, but I will still prune out all new growth, and I won't let them get any longer, either: you might just be able to see that this upright is between two windows, so it's important not to allow any further sideways growth, otherwise they won't be able to get the windows open. Or see out of them.

I've asked the owner to put up another couple of horizontal wires, lower down: and once they are in place, I will tie in new growth, one branch per wire, and prune off everything else, so the pattern will gradually spread all over the wall.

"Can it be that simple?" I hear you ask. Yes! It really is that simple!

"But what if I don't have any wires, or a wall to tie it to?"

Well, just prune it anyway. It works just as well with a free-standing bush: in fact, I have some photos of one, so come back in a couple of days and I'll put up a new post with pictures of it.  

If you are a bit nervous about hard pruning, then it is easier to prune to a tied-in framework, because it is very clear which ones you keep. But if you just have a wild, ragged bush somewhere, go out there now and cut off every branch which does not have berries on it. You might be surprised at how much better it looks, afterwards!


Did you enjoy this article? Did you find it useful? Would you like me to answer your own, personal, gardening question? Become a Patron - just click here - and support me! Or use the Donate button for a one-off donation. If just 10% of my visitors gave me a pound a month, I'd be able to spend a lot more time answering all the questions!!

Wednesday, 9 September 2020

Ivy Trees: topiary is not just Box and Yew, you know!

 Five years ago I wrote about my Ivy Tree: a piece of topiary on a garage wall. It started as just an outgrowth of unlovely ivy, but eventually I persuaded it to become a tree, much to the amusement of passers-by.


Good, eh?


Alas, a few years later the Client decided that extra water storage was more important, and the only place we could fit the new water butts, was in front of the topiary:

This kind of spoiled the point of the topiary (*laughs*), and it was going to be impossible to maintain it, as I would have to climb over and around the water butts to get to the wall - not very easy! 

So the ivy had to go: before the butts were filled, I had to move them out of the way, rip out the ivy, dig out the root, then re-install the water butts.

Undeterred, however, I turned my attention to another wall with ivy on it.


This is what I started with:

That's fairly  horrible, isn't it?

The Client asked me to stop it from getting under the gutter and creeping inside the garage, so the first job was just to cut it, a couple of feet down from the gutter, and pull off all the invaders.

This didn't take long - but it wasn't an answer, because they would quickly grow back, and I spent the next year,  doing this same job again and again.

Looking closely at the ivy, I found that originally, someone had planted a decorative, variegated ivy, but much of it had reverted back to plain old dark green: and of course in any competition between variegated (ie only part green) and fully green leaves, the branches with the fully green leaves are going to be much more vigorous, on account of having a lot more photosynthesising material than the part-white leaves of the variegated sections.

This, by the way, is why we have to keep a close eye on all variegated plants: we look out for reversion, and cut out any reverted - or "plain green" - branches as soon as we see them.

Here you can see one branch of variegated ivy on the left, among a mass of plain green.

So my first job was to cut out all the plain green stuff.

Which took me quite a while.... not least because I could only do twenty minutes at each session, as I also had the rest of the garden to look after!

Eventually, though, I'd removed all the plain, and was left with just the variegated.

Not a lot, as you can see - right.

But enough... so over the next several months, I kept an eye on it to make sure that only variegated material was allowed to grow.

As it grew, I gradually cleared off the stems, which would become the "trunks" of my trees, and allowed a bunch of growth at the top of each "trunk" to develop.

Slow work, with ivy, but a year later we were at this stage:

Not bad... but the left hand one is much too big, and it's all one big blob, whereas the rest of it is already suggesting a more Japanese-style cloud-pruned style of tree.

You can also see a lot of new bright green growth at the base: that's the  kind of thing that you have to be very aware of, and remove as soon as it regrows.

There we go, much better: I thinned out the left-hand lollipop and turned it into three separate blobs, rather than one gigantic one.

And again, note the new growth at the base - if you do this sort of topiary, you do have to keep on top of it!

I then decided that the left-most blob didn't need the lower limb at all, so off it came.

Now we are starting to get somewhere!

Over the following few months, I kept trimming back the "trunks", gradually removing all the foliage from those sections, and only allowing growth on my "clouds" or pompoms. 

Then it had a bit of a set-back: I missed it off the schedule for a couple of months, while we were doing some big projects in the garden: installing raised veg beds, moving plants around, new trees: all sorts  of interesting things.

But this meant I didn't have time to pop out and check the back of the garage.


Oops! And there it was, back up to the gutter again, and trying to get inside the garage.

Time to give it a stern talking-to!

Twenty minutes later, peace had been restored:


Ah, that's better! 

It wasn't as bad as it looked.. well, it was, but it didn't take me long to get back to where we were.

So this is pretty much the finished article.

Or is it?

Topiary is never quite finished: I find there is always something more to do.

A year later, I decided to finesse the left-hand blob just a little bit more, and here is the current state of play:


There, I think I can be proud of my copse of cloud-pruned trees, don't you?


Did you enjoy this article? Did you find it useful? Would you like me to answer your own, personal, gardening question? Become a Patron - just click here - and support me! Or use the Donate button for a one-off donation. If just 10% of my visitors gave me a pound a month, I'd be able to spend a lot more time answering all the questions!!

Friday, 3 April 2020

How to make a Box ball into a happy smiling face!

On Wednesday, I asked what you thought I was going to do with this rather ragged Box ball:


The answers were many and varied: well, actually, I only had three.

And the prize goes to John S, for saying "you are going to trim it into something amusing".

I certainly did!

Ten minutes with the shears, and here she is:

Far from finished, but you can see where I'm going with it.

The plan is that by mid summer, the face will be distinct enough to make the children laugh, when they come round that side of the garden.

I never did give her a name... but in case you want to know how she has developed, I have just published an update to this article, so scoot over there, and check it out!


Did you enjoy this article? Did you find it useful? Would you like me to answer your own, personal, gardening question? Become a Patron - just click here - and support me! Or use the Donate button for a one-off donation. If just 10% of my visitors gave me a pound a month, I'd be able to spend a lot more time answering all the questions!!

Thursday, 28 November 2019

How to do topiary to Ceanothus

Topiary is not just for Yew and Box: there are many shrubs which can be clipped into decorative shapes, and they don't always have to be formal boxes or cones, or strange lumpy animals.


A few days ago I wrote about a Juniper which I've been patiently Cloud pruning for the past few years (left),  and today I'd like to share a different sort of shrub which I have been working on for a few years: this time it's a Ceonothus.

There are many types of Ceonothus, it's a wonderfully varied genus: most of them are evergreen, but some are deciduous: most of them have blue flowers, but you can get white or pink ones: some flower in spring, some in summer, some in autumn: some are small, some are taller, some - like the one I'm about to share with you - can grow into small trees, if they are supported and pruned when they are young.

This means that if you really, really like blue flowers, you could have them nearly all year round!

This particular one is semi-evergreen, which means that in a mild year, they will hold their leaves all through the winter. It was planted slap up against a fence, which gave it support and shelter, so by the time I got there, it had become quite a monster, pushing itself out over the grass, interfering with the rotary washing line and swamping everything below it.


 Here it is in May, flowering magnificently, but rather top heavy and in fact, one branch on the left had broken under its own weight, leaving a rather odd gap.

My original plan was to reduce it in two phases: this year I would chop off all the front-facing branches, leaving just a high canopy.

Then, when it had started to re-grow, I would chop off the top, leaving a chest-high bush, which would be much more manageable.
So, step one: remove all the front-facing branches.

Here we are - right - having revealed the trunk, which had not seen the light of day for several years.

To my surprise, it was rather shapely: one central trunk, soon branching into three quite nicely balanced branches.

After looking at it for a couple of weeks, I was getting to like it like this.

One day, the owner needed a dead tree removed, and I'd recommended Rob, who is my go-to-guy for all the jobs which are too big, or too heavy, for me to do, or which are going to generate a ton of waste, as he has a waste licence and a big trailer!  Rob duly turned up to have a look at the tree, and while he was there, he commented on this Ceonothus.

I explained that it was only phase one, but he said that he liked it as it was, and that I should consider leaving it.

As I had already decided that I liked it, I thought I would go with this suggestion!

So, I left it.

Over the summer, the trunk sprouted a lot of new growth, which I removed, to keep the trunk clear.


Here it is in Feb of the following year, and just see the shadows on the fence, which mean that the rest of the fence, and the bed below, are now getting the benefit of some sunlight.


Here it is in June of this year - flowering over (it was wonderful!) and looking a bit pale, so I gave it some general Growmore feed.

You can see a few bits of regrowth at the base, they had to be cleaned off, and I trimmed out a few of the dead sections in the upper canopy while I was there.

I had also noticed that the canopy was a bit unlevel  - the left-hand side was lower than the right, so I adjusted that.

You might also be able to see that now there are plants growing underneath it: some nice white Astrantia on the left, and some lush deep red hollyhocks on the right.

Those hollyhocks are actually a wee bit too tall to fit under the canopy (remember, I originally planned to remove the canopy and make it back into a bush), so they are going to be moved next year.


 And finally, here it is as of last week: it had sprouted a tangled mass of growth at the base, so all that had to be cleared away again, and now you can see how level the canopy is.

Everyone who visits the garden admires it, and now that the bed below it has recovered, I can think about what to plant underneath it, to extend the season of interest in this rather neglected corner of the garden.

For the time being I've moved a lot of Hollyhock seedlings in there, just to keep them safe until I can see if they will come true from their parent and be a beautiful dark red, or whether they'll come up in any-old-colour, which is always the issue with open pollinated hollyhock.

So there you have it, topiary is not just for Yew and Box!

Update: Here it is, flowering in May of this year:


Nice, eh?!


The Hollyhocks underneath came up well, although the original one on the far right was too tall, as I've mentioned above. 

So I will be moving the Hollyhock over the winter, and I'll be thinking about what else to underplant.

The border is still a bit "skinny" there, so I might widen it, maybe put in a nice curve, or maybe I'll keep the straight edge, but give it another foot or so, which will allow me more space for underplanting.


Did you enjoy this article? Did you find it useful? Would you like me to answer your own, personal, gardening question? Become a Patron - just click here - and support me! Or use the Donate button for a one-off donation. If just 10% of my visitors gave me a pound a month, I'd be able to spend a lot more time answering all the questions!!

Wednesday, 20 November 2019

How to: start a Cloud pruned Juniper from scratch

Warning - this article is not for the faint-hearted....*laughs*

Have you ever admired those complicated cloud-pruned conifers? You know the sort of thing...


They cost a lot of money (the above one is 2'/60cm high) because they take a long, long time to train and prune.

Here's another specimen:


Check out the price - ten thousand pounds!!!

OK it's 230cm high (I can't work that out in my head but it must be about 10' tall) but still, that is an awful lot of money.

Both of these are Bonsai, which means "grown in a pot".

What's that?  Are you raising your eyebrows at me, and saying "Actually, 'bonsai' means little tiny trees carefully trimmed to look like big trees, but in miniature. That's what 'bonsai' means."

No it doesn't.

"Bonsai" means "grown in a pot."

There is another word for "young trees carefully trained and trimmed to look like really, really ancient trees" and this word is niwaki. It can mean just "a tree which is growing in a garden, as opposed to a tree growing in the wild", but it can also mean something like "the essence of a tree", so a tree which has been trained and pruned in the niwaki style means that someone has dedicated several years, into the training and pruning, the "sculpting", if you like, of the tree.

I love topiary, as all my Clients/Trainees/Students,  past and present, know. (In fact, one local gardener once said that she always knew, when she went to a "new" garden, if I'd ever worked there, as there would be some piece of slightly unusual topiary... I suppose that's fame?)

And I love the niwaki style, although I rarely have the luxury of dedicating four or five years to one single specimen.

I've always wanted to have a go at creating one of  these cloud-layer trees, the ones with pads of foliage on long bare branches, and I got a chance, back in 2016.

This is how it happened... in one of my gardens, I found a rather nondescript, nothing-in-particular Juniper (type of Conifer) growing in a rockery.


 As you can see - left -  it had been somewhat swamped by the neighbouring Asters growing up through it.

(The Juniper is the greyish-green bit...)

So the first job was to dig out some of the Asters, to give it breathing space.


This left me with this - right - a rather ugly, scruffy, conifer with no style, no "form", no nothing really.

The only thing you could say about it, is that it's green all year round.

So I decided to give it a radical prune. The Client didn't care what I did to it, so I thought aha! Perfect! I'll have a go at niwaki, see if I can convert it to a cloud pruned form, and if it all goes horribly wrong, I'll dig it out and throw it away.


So I started removing branches.

This is the back view (yes! They have a pool!), and I worked my way in at ground level, removing all the stems which were growing horizontally, because they were too close to the ground.


One wheelbarrow full later....

At the front again, now I am starting to see the shape of the branches.

There are some fabulous ones, shooting off at all sorts of odd angles.

I particularly love that right-angle on the left!

Perfect!

*snip snip snip*


Another couple of barrow-loads of branches later, it was done....

... and this is what I ended up with.

Weird bare stems, at odd angles, with "pads" of foliage on the tips.


Here we are two years later, in August.

As you can see, the foliage is growing back nicely, and is making quite shapely, thick, pads.

All I did was continue to clip back the pads as they grew. Quite easy, really!

This - left - is what it looks like today, in 2019.

The pads are all thickening up nicely, and in fact I'm now looking at it and thinking that I could remove a couple of them.

When I first did it, I was a wee bit cowardy-custardy when it came to removing branches, and I didn't quite take enough off.

Next spring, I'll go over it again and remove a couple of the more congested ones.


Here's the view from underneath, as it were.

You can still see that original interesting angle of the main stem, and you can see how the branches are fairly close to horizontal.

Not quite as horizontal as they would be if I were training a tree in my own garden, as I would be using guy ropes, canes and weights to pull them down to absolutely horizontal.

But considering this is in someone else's garden,  and I'm only there once a week, it's not bad, eh?


And in case you are wondering, this was the inspiration for the project: a Japanese print belonging to the Client.

So there you have it: how to take an anonymous conifer blob and turn it - over a couple of years - into a thing of Japanese style and beauty!


Did you enjoy this article? Did you find it useful? Would you like me to answer your own, personal, gardening question? Become a Patron - just click here - and support me! Or use the Donate button for a one-off donation. If just 10% of my visitors gave me a pound a month, I'd be able to spend a lot more time answering all the questions!!

Wednesday, 4 July 2018

Practical gardening skills: clipping box topiary

I've been neglecting the blog somewhat, *guilty face* as I have been working super-hard for the last couple of months: not only making hay while the sun has shone, shone, shone, but presenting my usual FSC training courses, including - for the first time - a one-day workshop on the extremely challenging topic of How To Use A Botanical Key.

Not an easy course to run!

I've also been working really hard on Garden School, which is my big project for passing on practical gardening skills. We've been clipping box topiary hedges like mad things:

Here's the Big Knot, half done. Can you see where we've been? *laughs*

Have you ever wanted to have a go at something like this?

Have you ever wandered round all those stately homes, wondering how they get such nice neat edges on their hedges, or how long it takes to clip them? Ever wondered what happens if they slip, and chop off the wrong bit?

Come along to Garden School and find out for yourself!

It's not often that individuals will get a chance to have a go at full-size, mature topiary, but take it from me, it's not rocket science, and almost anyone can do it.

Each session starts with tools (cleaning, maintenance), an explanation of how the plant grows and how we use this knowledge to create the shapes we want: then a demonstration of how to clip, and then you get a chance to do it yourself, including the aftercare of the plants, and how to avoid pesky things like box blight.

The Big Knot is now finished, but of course we'll be doing it all over again in mid September, so if you want to book a place, contact me now for details.

In the meantime, I have a few places left on a very specialist Topiary course: renovation of neglected box hedging. Not for the faint-hearted, this is a chance to see how to restore topiary. There will also be some Box Ball Clipping, which is always fun.

To book a place, or to learn more, contact me at Inquiries@rachel-the-gardener.co.uk.

Saturday, 13 May 2017

Irish Yew: reversion

I've written about Irish Yew recently, and now another strange case has come to my attention.

A Client of mine has a beautiful double avenue of slender Irish Yew:

 ...there, aren't they lovely? Marching down the grassy path, with a solid ordinary Yew hedge at the end, and an arched doorway cut in it.

*sigh*

It doesn't get much better than this..

But I noticed something odd about one of them.
 Uurgh, what's that untidy growth at the bottom?

They are not supposed to do that!

Close inspection showed that there were two stout stems arising from the base of the tree, which were not Irish Yew but were ordinary English Yew.

It's quite a good illustration of the difference between them: they are both Yew, but the English Yew branches are sprouting off in all directions, and even in this photo, you can see that the individual leaves are not crisply curling, the way that those of the Irish Yew are.

This is not the first time I've seen this: I was visiting Snowshill Manor a year or two back (don't bother: there's hardly any garden worth the word, people go there to look at the house and the eclectic contents, apparently)  and found this:

Doesn't that look familiar?

It's exactly the same problem, a fastigiate Yew with a sprouting bunch of "ordinary" Yew at the base. I'm sure I've seen another one somewhere else, at another public garden, but I can't find the photo.

Anyway, you see the problem: the "wrong" plant is growing at the base.

And the entirely "wrong" way to deal with it is to do what the useless gardeners at Snowshill Manor did, and attempt to clip it into the same shape as the fastigiate Yew.

As an aside, this is something that (professionally) drives me mad: paid gardeners not doing a proper job. It's perfectly ok for the owner of a garden to bodge it up in any way they please: it's their garden, it's their time, they might do something which I consider to be horticulturally inept, but I am most likely to just laugh a little bit (sometimes behind my hand, to be polite) and let them get on with it.

But it's a different story when a gardener is being paid to work there, and - in my opinion - should be expected to know the difference between plants, and how to deal with problems like this. Not to take the easy option of running the hedgetrimmer over it.

OK, enough of me grumbling: what, then, is the "correct" way to deal with it?

The "correct" way is to remove the "wrong" shoots as soon as you find them, long before they turn into an eyesore and need repeated clipping for the rest of their life...

Here's the sequence of events:

1)  Assess the situation.

Here's my slender upright Yew, with tufty-tail at the bottom. Taking hold of those branches, and pulling them gently outwards, I could see that there were two individual branches of the "wrong" Yew, springing out from below soil level at the base of the tree.

I tried to clear the soil away from them, to see if they were individually rooted, or were just suckers off the original tree, springing out from just below ground level - a lot of grafted plants do this, it's very annoying and needs to be dealt with firmly by removing those suckers from as low down as you possibly can. Just cutting them off at ground level won't work: the stumps will send up more shoots than ever. You have to rip them off from their base: sometimes this is easier said than done.

 Here's the first one: it seems to me that this is a separate plant, it has a thin root going sideways as well as a big thick one going downwards.

But I couldn't get it away from the main roots.
 Here - right - is the same root from the other side, and you can see "wrong" shoot number two, between it and the thick original trunk.

Again, I can't separate the roots - I can't find a gap to push the daisy grubber into.

On the one hand, this could indicate that the "wrong" shoot is a reverted sucker: it could equally well indicate that it's a seedling which has become grafted to the original tree's roots as it grew.

 As I can't get the shoots to pull away from the original trunk, all I can do is saw them off as low as possible, and here are the two front shoots, newly sawn.

I will now keep an eye on them through the next season or two, looking out for regrowth, and removing any that I find.

If I knew for certain that they were separate entities, I would dab some glyphosate weed-killer on the cut faces of their stumps, but as the roots do seem to be welded together, I can't risk doing that.

So, where does that leave us? The row of fastigiate Yews now looks correct again, with no rufty tufty English Yew trying to push its way into the arrangement: and I will be checking it every so often and removing any regrowth that I find, until those "wrong" shoots run out of energy and give up trying.

The question I am left with, though, is this: are these non-fastigiate shoots a case of the plant reverting, in the same way that variegated shrubs often through out a plain green shoot or two? Or are they actually seedlings which have dropped very close to the parent (fastigiate) Yew, and haven't been noticed as they grew?

I'm definitely in favour of the seedling theory.  I know that Irish Yew trees are very nearly all female: they bear the berries, which is how you can tell, but this means that they are normally pollinated by English Yew. I know that they rarely if ever come true from seed - the seedlings are overwhelmingly ordinary English Yew. I know this from my own experience, as well as from researching it, as I have weeded out about a million Yew seedlings from around the base of Irish Yew, and not one has ever grown into Irish Yew, they have all grown into normal English Yew.

So, in my opinion, it seems quite possible that some of the seeds will fall very close to the trunk of the Irish Yew, and would easily be overlooked when it came to weeding, to the point where they look as though they are shoots from the original tree. This is what I think happened here, but I can't tell for certain as all the roots are intertwined.

So now I am on the look out, every time I see Fastigiate Yew, for small shoots of the "wrong" Yew, small enough for me to be able to pull them out by the roots, if indeed they are on their own roots!


Did you enjoy this article? Did you find it useful? Would you like me to answer your own, personal, gardening question? Become a Patron - just click here - and support me! Or use the Donate button for a one-off donation. If just 10% of my visitors gave me a pound a month, I'd be able to spend a lot more time answering all the questions!!