Thursday 30 December 2021

Hellebore foetidus: early winter tidying

Helleborus foetidus: Stinking Hellebore. What an unfair name!

For a start, it doesn't stink - ok, it does have a bit of an odour, and it's not one that I want to bring into the house, but it's not that bad... other names for this plant include Bear's Foot, which is somewhat nicer although not particularly appropriate,  or - according to Wikipedia - dungwort or setterwort. Never heard either of those two.

So, Stinking Hellebore it is, and what's so good about it?

Well, you are probably all familiar with the usual Hellebores, H.orientalis: big showy flowers, in shades of white, red and pink, they are just starting to put up their flower shoots now (mid winter) and in a month or so they will be looking like this:

Lovely, aren't they?

But at present they are no more than a small bud, usually still covered up with the blackening leaves of last year, so if you want something that flowers earlier, and is a bit more unusual, try H. foetidus.

The flowers are a vivid pale green, and on dull winter days they shine and glow, so they are perfect for shady woodland beds, for the back of borders, and for any of those tucked-away places that you don't really care about all that much, but which you can see from the kitchen window.

They are perfect for this sort of area because they thrive on neglect -  no, honestly, they do.  They'll self seed, and form colonies, with no human interference at all.   In fact, one Client of mine announced last spring that she wanted to buy some, having seen them in another garden. I was able to provide her with a bucket full of seedlings, weeded out from my own garden, free of charge: plenty enough to get a good colony going in her garden. I am confident that in about three years' time, she will be telling me to weed out unwanted ones...

But, although they do indeed thrive on neglect, they can benefit from a little subtle pruning in the early part of their flowering season.


This is because, sometimes, the leaves swamp the flowers - by which I meant that sometimes there are just too many leaves, and sometimes the leaves turn black (if it's been a hard winter, usually) or go an unlovely, tatty, shade of brown.

This photo - right - shows a clump of them, with the leaves just starting to go black, and it was taken in early December.

In those cases, I get out the secateurs and carefully snip off the worst of the leaves:

Here's the result - left -same clump of plants, from the same angle, two minutes later.

Lighter, brighter, and there are new leaves coming through all the time, to take the place of those dull, dying ones.

And this plant has a sneaky little twist in the tail - or, to be more accurate, in the flower.

Generally speaking, the flowers are an unusual bright lime green, but then, green is not exactly a special colour, in gardening, is it? 

However, here's the interesting part - once the weather has been cold for a few weeks, the flowers develop a red tinge around the edges.

Not the best of pictures, but then, I'm not a photographer - I'm a gardener! So I just grab a quick snap, when I get ten seconds or so to spare.

And here is one of my ten-second snaps:  you can see the red rim.

You would probably expect me to say "...the red rim of the petals" but in this case - brace yourself for some botany - those are not actually petals at all, they are sepals.

If you're not clear on the difference between petals and sepals, come back in a week or two's time, I'll do an article about it. Just for you.

Getting back to the red rim on the sepals, it's quite subtle, but interesting: and the more you look at them, the more interesting they are.

Here - left - is a photo taken by my buddy Max (who really is a photographer!) and it shows the texture of the outer sepals: isn't that weird?

Very alien...

And it shows what a wonderful world surrounds us, if we just get outside and look at it a little more closely...

Anyway, back to the plot: in early-mid winter, then, it is well worth going out with the secateurs and snipping off any dead, or dying, brown or black leaves from your Hellebores, because then you will be better able to see the flowers - and whether they are petals or sepals, doesn't really matter!


Did you enjoy this article? Did you find it useful? Would you like me to answer your own, personal, gardening question? Become a Patron - just click here - and support me! Or use the Donate button for a one-off donation. If just 10% of my visitors gave me a pound a month, I'd be able to spend a lot more time answering all the questions!!

Sunday 26 December 2021

How to COMPLETELY stop your "real" Christmas tree dropping pine needles all over your carpet. Honest!

Clickbait!  Clickbait!

I'm guessing that few people are going to be reading this blog over the holiday season, so I thought I'd slip in something to catch all the googlers who are not the least bit interested in gardening, and who won't ever come here again, so I can afford to insult them, just a little bit.

It's a "catch" question, or rather, a "catch" answer.

Preparation:

OK, you know how you should never take a medical person to see a medical film, or a laywer to see a film with legal stuff in it, or a policeman to see any film with any sort of police procedure in it, or - for that matter - a Consultant Forensic Horticulturalist (that's me) to see anything with forensic procedures in it....

...because they will either sit there, gamely gritting their teeth all the way through, or they will spend the whole time saying things like "But that's not true!" or "But that doesn't work like that!" or "But that would never happen like that in real life".

And I'm sure you're familiar with the best way to wind up a bird-watcher, ie to start talking about seagulls. Apparently there is no such thing as a simple "seagull", they are types of gull. But frankly, when I hear something mewing above me at the seaside, I don't care if it's a, for example, Black-headed gull, or a Lesser Black-backed gull, or a Greater Fluff-tailed gull (ok, I made that one up), I just say "it's a seagull!" and protect my chips...

So, in a similar way, I get a bit vexed when people ask me how to stop their real Christmas Tree dropping pine needles all over the carpet.

Why? 

Simple answer: are you ready for it?

Your Christmas Tree won't drop pine needles on the carpet because IT'S NOT A PINE!!

*laughs hysterically*

This is because "real" Christmas trees are either Fir, or Spruce. Not Pine. Why does that matter? Because Pine trees (Pinus) have needles. The others - Fir, Spruce, Douglas Fir, Hemlock, Yew, (not that many people use Hemlock or Yew for their Christmas trees) all have leaves. Flat, green leaves. Not needles.


Fir = Abies: the usual/most popular ones are  Nordman Fir (Abies nordmanniana) as shown on the left, or Fraser Fir (Abies fraseri) which, frankly, looks pretty similar.


Spruce = Picea, the most popular being Norway Spruce (Picea abies) and a blue-tinged cultivar,  Picea pungens 'glauca'

That's Spruce, on the right: again, they have that typical pointy-tipped Christmas tree shape.


How to tell the difference? Answer, come on one of my Tree ID courses in London next year... or if you can't get there, you can buy my introduction to Conifer ID - simplified, but not dumbed down - from Amazon.


Pine = Pinus, and although they are conifers, they are not generally sold as Christmas trees, mostly because they just don't have that nice pointy shape: when they grow up, they are flat-topped. And they tend not to have the regular spacing of the branches, which makes hanging the baubles a bit tricky.. and finally, they have long thin needles (*laughs*) which are held in bundles, leaving whole areas of the twigs and branches quite, quite bare.

So there you have it: to be botanically correct, your tree can't drop pine needles because it is not a pine. Well, 99% of the time it's not a Pine, there are bound to be one or two people who will leave indignant comments to the effect that they have a Pinus sylvestris (Scots Pine) currently in their living room, thank you very much, and it is indeed dropping "needles" all over the carpet. But generally speaking, "real" Christmas trees are going to be Spruce, or Fir. 

Which have leaves.

 Oh, and one thing which made me hoot with laughter, speaking as a botanist, is - brace yourself for a real in-joke, which no-one but another botanist would understand or appreciate - the name of an internet supplier of "real" Christmas trees: they've called themselves "Pines and needles". But they don't sell Cedar, or Larch, just Christmas trees.

*pause while I fall about laughing*


Did you enjoy this article? Did you find it useful? Would you like me to answer your own, personal, gardening question? Become a Patron - just click here - and support me! Or use the Donate button for a one-off donation. If just 10% of my visitors gave me a pound a month, I'd be able to spend a lot more time answering all the questions!!

Monday 20 December 2021

Michaelmas Daisies: not just a pretty face

The clocks have long since gone back, winter is upon us, and the Michaelmas Daisies have gone to seed and, in most gardens, have now been cut right down: heyho, another season in the garden is rolling to an end.

Did you know that Asters are called “Michaelmas Daisies” because they start flowering in September, which means that they are in full flower and ready to be picked, in time for Michaelmas Day, which is the 29th September. 

Here -  left - are a bedful of Asters, taken on the 18th September.

Why would they need to be available on that day, of all days?

Apparently, it was so that, on that day,  young ladies could pick off their petals, one by one, while intoning “He loves me, he loves me not” in sentimental voices,...  I always thought it was the common white daisy - Bellis perennis - which was mutilated in this fashion, and I hadn't realised that there was a specific date on which to do it, but apparently the tradition started with Asters, on Michaelmas Day.

Over time, it migrated from Asters, on that one day, and became simply "daisies" and "all through the summer".

While doing some research for this article, I discovered that although we now use the common daisy, Bellis perennis, we used to use the Ox-eye daisy, Leucanthemum vulgare, for this game: personally I think we should return to that tradition, as I detest the coarse, thuggish Ox-eye daisy and would be happy to see them ripped to shreds all over the country... whoops, getting a bit carried away there, Ox-eye daisy and all forms of Euphorbia being my pet hates in the garden!

Interestingly, dear old Wikipedia says that the tradition is of French origin, from their game “Effeuiller la Marguerite” ("to pluck the daisy"). But a Marguerite is actually the genus Argyranthemum, which are annuals with large daisy-like flowers. Not actual daisies at all. 

Which, incidentally, shows the importance of learning the proper names of flowers, to avoid all this confusion....

Presumably the young ladies started using any old daisy-like flower, because they didn't want to have to wait until the end of September before choosing the path of true love?

If you've ever wondered why Asters are so reliable as to their flowering date, it's because they don't rely on temperature to determine when they flower, but on day length: and the autumn equinox occurs around the 22nd - 24th September, about a week before Michaelmas Day. This change in day length, the shortening of the days, triggers the plants to start flowering their socks off.

So regardless of the weather - and boy, have we had some weather this year! - they will always be in full flower throughout late September and October, which makes them very useful in the borders, to cover up the gaps and give a splash of colour.

My particular favourite among the Asters is Aster divaricatus, with white flowers and dark, nearly black, zig-zag stems. (I always think of the stems as being “diverted” every couple of inches.) It's what's called a “lax” plant, which means that it's floppy and does not attain any sort of height, so it can be a bit tricky to place it, in a mixed border.

But this year, I came across a very happy accident: late last year I lifted some Asters which were in the wrong place, and heeled them in at random in from of my A. divaricatus, just to keep them alive; and yes, they've been there all summer long. (oops!)

As a result, my A. divaricatus had to grow up through and amongst them, which meant that this autumn, I had a lovely display of lilac Asters, with my white lax ones dotted amongst them like stars. 

Superb!

Needless to say, this is now a plant pairing that I am going to repeat all round the garden - but I won't be pulling their petals off, one by one! 


Did you enjoy this article? Did you find it useful? Would you like me to answer your own, personal, gardening question? Become a Patron - just click here - and support me! Or use the Donate button for a one-off donation. If just 10% of my visitors gave me a pound a month, I'd be able to spend a lot more time answering all the questions!!

Friday 17 December 2021

Box Bronzing: it's not blight!

We are into December, we've had a cold snap, and now a lot of people are asking me what is wrong with their Box, in hedges and particularly those in pots - instead of being a healthy green colour, they are turning a nasty orangey-brown shade: like this...

"They're dying!" I hear people cry.

"It's blight!! We're doomed!" they say.

Well, I can tell you, in the words of Douglas Adams: Don't Panic!

This is called bronzing, and it's a perfectly natural phenomenon: it's a reaction to stress, which is usually a combination of cold weather, wind scorch, drought and a little bit of hunger. 

Plants in pots are particularly susceptible to it, as they don't get the same access to water within the soil that a Box hedge does, and they likewise lack access to pretty much any nutrients other than the ones we choose to give them - if we remember!

Come spring, these plants will need some feed and some watering: liquid seaweed feed is the best thing, both as a soil drench and as a foliar feed - and all that means is that you dilute it as per the instructions, then water it generously from above, splashing it all over the foliage, as well as around the base. 

If you have any comfrey, then a well-diluted liquid comfrey feed would give them a treat: and if you have neither of those to hand, well, good old Growmore (or any other general purpose plant feed) will do.

Then, next summer, give them a good thick mulch of organic matter, with a fistful of Fish, Blood & Bone (which sounds like a particularly distasteful new boy band) beforehand, and make sure that - if they are in pots - they are well watered.

For now, there's not much you can do to help them, as there is no point encouraging them to put on new leaves now, just as the cold weather moves in: any new growth will just be ruined by the frost, and they will have used up their resources for nothing. Better to just take some photos to remind you that next year, they'll need some regular feeding through the summer to reduce the chances of it happening again!


Did you enjoy this article? Did you find it useful? Would you like me to answer your own, personal, gardening question? Become a Patron - just click here - and support me! Or use the Donate button for a one-off donation. If just 10% of my visitors gave me a pound a month, I'd be able to spend a lot more time answering all the questions!!

Wednesday 15 December 2021

It's Sedum Time!

This is one of those articles which can be read and actioned at any time from late November, through to about February-ish, depending on the weather, an on our personal choice. 

Or, in my case, depending on When The Gardener Has Time To Do It! 

Many of us have the tall border Sedums such as S. spectabile in our gardens – they are extremely reliable, very forgiving, tough as old boots, capable of withstanding drought, poor soil, disruption, digging dogs and general neglect, and they still come up with flowers every year. Best of all, they are a magnet for butterflies and insects in the summer, and the birds enjoy clearing the seeds out from the dying flat-topped flowers in autumn. 

My personal favourites are the dark purple-leaved varieties: left.

There's a nice one called S. telephium ‘Atropurpureum’, with lovely purple leaves, and dark pink flowers: and even better is the cultivar 'Purple Emperor' whose leaves are really dark and shiny, lovely! 

I'm not entirely sure what these ones are, as they are old plants, but I would not be surprised if they were 'Purple Emperor'.

Regardless of their foliage colour, at this time of year they are looking sad and horrible – all dead and brown on top, and many of the upright stems have been damaged by wind and weather – but the new growth is already starting, so now is the perfect time to get out there and cut them down:  not least because it makes it easier to rake out those pesky fallen leaves!

It's really easy to do: just follow each dead stem down to the base, and carefully snip it as close as you can to the new growth, taking care not to damage those new leaves. Don't pull out the dead stems, as you are likely to uproot small sections of the plant if you do so: snip them off neatly, as low as you can.

While doing this, if you find any really dead, blackened stems from previous years – possibly when you didn't get out in time to cut them very short, and had to cut them at ankle height – pull gently on them, and with luck they will come out cleanly. This reduces congestion, and allows better air circulation at ground level, which helps the plant to avoid mould and other diseases.

The seeds should all be long gone by now, so the parts you remove are ok to go in the compost – and if you should, accidentally, break off any parts of the plant that are starting to grow, don't waste them: snip off the dead top stem, and pop them into small pots of compost, or even just push them into the ground nearby. 

Many of them will happily grow on, and in a few months you will have strong new plants to give away, to swap, or to add to the garden. 


The photo on the left here, shows a good sized clump with the dead brown flowers hovering above – this is what most people have, at this time of year, right through the winter.

This photo was actually taken in February, and you can see that I'd been called in to clear a very weedy, mossy, congested bed: can you see how far I've got?!!?


This photo - right -  is the “after” picture, showing what you should have left. 

Just the knobby new growth, or - in this case - just the smallest of new shoots, with all those dead stems neatly clipped away.

Now, I am aware that some people will say "ah, but  you should leave those dead brown heads, as the little birdies like to eat all the seeds."

But, despite at least 18 years of gardening professionally, and a lifetime of watching little birdies, I can say - hand on heart - that I have never, ever  seen a bird taking the seeds from a Sedum head. Not when they are dead and brown, not when they are fresher and still colourful.

Not once. Not ever. Never.

So I am utterly ruthless with my pruning of Sedum - as soon as they go brown and icky looking, I chop them off.

There's another reason for such ruthlessness (side issue: why aren't I Ruth, instead of Rachel? Equally biblical, if biblical was what my mother was aiming for: and then I could, amusingly, be Ruth the Ruthless Gardener. It has quite a ring to it, don't you think?) (apologies for the digression, back to the  plot...) 


Yes, the other reason is that if you leave it until spring, these buds will start to grow.

This photo - right - was taken in early March: you can see the primroses flowering! But the point is, the new, tender, soft, fleshy growth is already a couple of inches high, making it impossible to get the old stems off without damaging the new.

So don't wait too long – grab your secateurs and get out there now! 

One final question – the common name for S. spectabile is Ice Plant: why? why? The foliage is green, the flowers are pink, where does the “ice” come into it? 

Mind you, “Stonecrop” is not exactly an accurate descriptive name, either! Even worse, S. telephium is, incomprehensibly, commonly known as “Orpine”. 

Commonly known? Do you ever refer to this plant as Orpine? Have you ever heard that name, before?! 

I just call the whole lot of them Sedums and leave it at that!


Did you enjoy this article? Did you find it useful? Would you like me to answer your own, personal, gardening question? Become a Patron - just click here - and support me! Or use the Donate button for a one-off donation. If just 10% of my visitors gave me a pound a month, I'd be able to spend a lot more time answering all the questions!!

Monday 13 December 2021

How to: clean out the greenhouse!

There's nothing like... a nice clean greenhouse.

And I bet that a lot of you are looking at the screen and muttering "and my greenhouse is nothing like a nice clean one!" 

Late December is a horrible time of year for working in the garden: it's cold, wet and miserable, and a lot of the time, there is a hard frost which makes it impossible to walk on the grass. 

Well, you can walk on the grass if you want to, but if you do so while it's crunchy with frost, you'll regret it later when you find dead brown footprints all across the lawn...

So what can we do? Answer: clean out that greenhouse! Get rid of all last year's dead tomatoes, tip out the tired contents of the old grow-bags on nearby beds or borders, and clear out all the clutter and bits and bobs.

If you have staging or shelving, lift it outside and brush all the dirt and cobwebs off. 

This is a doubly useful job: partly because it means all the dirt is now outside the greenhouse so there's less for you clear up in there: and partly because it gives you room to move properly inside.

This applies to all those stacks of empty pots as well: get them all outside, brush them off, sort them into sizes, and decide if you really need that many of them in the greenhouse. Do you really need that many at all, come to that! Keep as many as you are realistically going to use, and offer the rest on your local community website: far better to pass them on, than to send them off to landfill, as most councils don't seem to be able to recycle plastic pots as yet.

Then, when the floor is clear, you can wash down all the glass on the inside, getting rid of over-wintering bugs as well as cobwebs and general dirt.

Once that's done, a good sweep of the floor makes it look spick and span, and ready for the installation of new grow-bags in a month or so.

Best of all, as it's a greenhouse, it's a great deal warmer than working outside - especially if the sun comes out for a while!

Once you're nice and warm from working inside it, and you've put the staging back in place, it's time to look at the outside. 

Is there a mass of moss growing between the panes? 

Get a long cane, and see if you can run it carefully along the joins, to flick out clumps of moss. If you are feeling brave, get the hosepipe out and twist the nozzle until you get a really tight jet: use that to jet-blast along the joins and up the metal strips. 

It's a messy job, but can really get that moss off. 

Even if it's too cold for the “you will get wet doing this job” jet-blasting, you can run a long-handled mop across the roof, frequently dipping it in a bucket of water, to wipe off any bird poo, green algae or general dirt. 

And if you can get some of the moss off, so much the better. 

If you don't have a long-handled mop, well, improvise! Yes, that's a kitchen sponge, tied on to one of the runner bean canes...

But be gentle - when you are accustomed to double-glazing, the thin single panes of greenhouse glass can be surprisingly fragile. Ask me how I know... yes, I once leant too heavily and shattered a whole pane. I've been super careful, ever since.

Once the outside is clean as well, you can go inside - I mean indoors, not into the greenhouse - for a well-deserved cup of tea, knowing that when you decide to start your early seedlings and veg, the greenhouse is all ready for use! 


Did you enjoy this article? Did you find it useful? Would you like me to answer your own, personal, gardening question? Become a Patron - just click here - and support me! Or use the Donate button for a one-off donation. If just 10% of my visitors gave me a pound a month, I'd be able to spend a lot more time answering all the questions!!

Saturday 11 December 2021

Why you should never start a job...

 ...unless you are sure that you can finish it.

Or: Oh dear, I've out-clevered myself again!

This morning, in early December, I arrived at work to find that the Passion Flower (Passiflora caerulea) had finally finished flowering, which means that it was time to cut it right back, and pull all the upper growth down from the wall.

This particular one is on the south-facing aspect of a house, and in consequence, it grows like the proverbial Topsy (I have no idea who Topsy was, but my Grandmother in London always used to talk about me "growing like Topsy" and all my, er,  senior Clients seem to understand what it means...), so I cut it back to about head height every year, at some point over the winter.

In mild winters, it can stay green-leaved and lush all the way through: in other years, the leaves die off and fall: generally speaking, I prefer to cut this climber right back every year, mild or not, because otherwise it gets too big and too strong to easily pull down.

Also, the owners had asked me to clear it off of the house before Christmas, this year, because they were getting the builders in, early in the New Year.

So there I was, looking at a green and lush climber, but knowing that there were good reasons to cut it down a bit earlier than strictly necessary, horticulturally speaking.  

And for some reason, even though I had planned in my mind to do it next week, I started merrily cutting it down.

All went well, the bulk of it came down with no problem, but...

...but.....

.. yes, there were a couple of strands which were hooked up on the support wires.


Now, this is nothing new: it happens every year, and I have exactly the same issue with the Virginia Creeper (Parthenocissus qinquefolia) on the west-facing wall of the same house.

Most of it peels off, but there always a few stubborn bits which cling to the tiles and have to pulled down individually, using one of my long tools.

And guess what? I don't take my long-handled tools to work, unless I know that I am going to need them, because they are somewhat cumbersome in the car. On account of being "long-handled".

Which means that I wasn't able to quickly and easily lift down those last few strands.

Oh bother.

(which is, of course, exactly what I said to myself, when I realised what I'd done.)

This means that I have had to leave this annoying tangle of greenery, to hang there for a whole week, until I am back - with the correct tool  - to finish the job.

Thus, the moral of this story: You ("one") should never start a job, if you don't have the specialist tools which you know you are going to need to complete it!


Did you enjoy this article? Did you find it useful? Would you like me to answer your own, personal, gardening question? Become a Patron - just click here - and support me! Or use the Donate button for a one-off donation. If just 10% of my visitors gave me a pound a month, I'd be able to spend a lot more time answering all the questions!!

Thursday 9 December 2021

Art in the Garden: Dior and a fantail

Isn't it nice when plants and sculpture meet and unite? 

The final photo in this article shows a very happy accident of juxtapositioning (if there is such a word) (according to my spell-checker, underlining it in cheerful red zig-zags, "no there isn't" but I'm ignoring it) in one of “my” gardens, which came about from three unrelated incidents. 

Firstly,  early in the year, the somewhat elderly owner of the garden took a tumble over the stone slab which used to mark the transition between the path and the grass. 

So I was asked to remove the slab, and sink a line of red bricks, flush to the ground, in place of it. 


Here's the slab - it weighs more than I do (!) and I could barely move it, so having levered it out of the ground, I just shuffled it off the path into the bed, heartlessly squashing whatever small plants were growing there. 


That left me with a hole, which was a very good start for sinking in my line of red bricks.

As you can see - right - the slab left quite a big hole, so I had to backfill it, in order to get the bricks to be flush with the grass.


("so much more than just a gardener...")


Here we go -  my new brick edging, with the slab moved off to one side. 

No more trip hazard!

Please note the total lack of any fern.

Secondly, we had to have some hedging work done behind the shrubbery, further round the garden. 

This meant that the sculpture, “Dior”, and the plinth on which it stood, had to be moved out of harm's way, so I plonked them onto the slab, temporarily. 

Just to get them out of harm's way.

Short term.

Temporarily.

The work took months...: and in the meantime, thirdly, the fern which had been hiding, unseen, behind the slab grew. And grew. And grew!

Now, in October, look at what a perfect fan-tail it has become:


.... somewhere between a peacock, and the tail-feather-fan of a Las Vegas showgirl outfit. 

The Client and I were both so pleased with this effect that we left it, just as it was. 


Which just goes to show that sometimes, you don't need to be an arty garden designer, or to spend hours deciding on exactly the right position for your garden statuary! 


 Did you enjoy this article? Did you find it useful? Would you like me to answer your own, personal, gardening question? Become a Patron - just click here - and support me! Or use the Donate button for a one-off donation. If just 10% of my visitors gave me a pound a month, I'd be able to spend a lot more time answering all the questions!!

Tuesday 7 December 2021

How to: not scream in fear at Mossy Rose Galls

 “A Rose by any other name would smell as sweet...” 

...said the Bard, but would it smell quite as sweet if you pushed your nose into one of these Mossy Rose Galls, I wonder? 


Weird, isn't it? Also known as a Robin's Pincushion gall, which is sweet, or rose bedeguar gall, which is unpronounceable: but I think that Mossy Rose Gall sums them up more neatly.

I occasionally come across odd mutations in the garden - fasciation is the usual one -  but yesterday I found this fluffy-looking gall on a hybrid tea rose. 

It's quite common to find them on Dog Rose, less common to find them on cultivated garden roses, but always interesting....

Like most galls, the Mossy Rose gall is formed by the action of a wasp, which lays eggs in a bud, or a developing leaf, during the summer. In this case, it's a particular Gall Wasp, with the lovely name of Diplolepsis rosae. Sounds more like a dinosaur with a sleep disorder, but no, it's a teeny tiny wasp. 


The eggs hatch into tiny maggots, which secrete a potent cocktail of chemicals, and it's these chemicals which cause the rose tissue to grow in this strange, distorted formation. 

Most of it is for protection: against the weather, and against predators and parasites. 

That outside layer might look fluffy - right -  but it's actually quite hard to the touch: not prickly, but rather like a brillo pad made of wood.  


Inside the gall is a series of small chambers: and by autumn, these would be filled with fat maggots, about to undergo their second major transformation. 

By the following spring or summer, the gall will start to rot and disintegrate, and the new generation of adults will emerge.


Here's a photo of a couple of large ones which I found while out walking one day:

Note that I am wearing gloves to handle them!

Do they hurt the plant? Well, no, not really: they do rob the plant of nutrients - proteins and carbohydrates - which the maggots use as they develop, but most roses won't even notice the difference, and it certainly won't kill a plant.

However, if you find them unsightly, just prune out any affected branches and burn them: this also destroys the developing wasps, so you're slightly reducing their population for next year.

And if you have a massive infestation of them one year, you could always cut them out on long stems, dry them, spray them silver and use them for Christmas decorations.

 So it's not a mad mutation, or some horrible infectious disease which is going to ruin your roses: it's a simple "nest" in effect, for a particular small wasp.

No need to scream in fear, if you find any! 


Did you enjoy this article? Did you find it useful? Would you like me to answer your own, personal, gardening question? Become a Patron - just click here - and support me! Or use the Donate button for a one-off donation. If just 10% of my visitors gave me a pound a month, I'd be able to spend a lot more time answering all the questions!!

Sunday 5 December 2021

How to: make you patio not only larger, but neater!

You can call me sad, if you want to, but I like a nice neat edge on lawns: a sharp, crisp cliff-edge on a flower bed helps to stop couch grass creeping into the flowers, and if the person mowing can see where the edge is, they are much less likely to let the mower roll over into the bed, making those horrible round scalped patches. 

And when it comes to paths and patios, I think that a nice neat edge makes all the difference. 

Rather like trimming your fringe, if you haven't got time to go to the hairdresser for a proper cut...

Autumn and winter are good times to do this sort of job: not only are there better things to do in summer, but once you have cut back all the herbaceous plants, you can often get a better look at paths and patios.

Last week, I noticed that the patio in one of “my” gardens was looking really weedy and untidy, so I spent some time hand-weeding all the cracks, and sweeping off the debris. Instant spring clean! But then I noticed how far the grass had crept over the slabs. 

Have you ever seen grass doing this? 

If you leave it long enough, it extends itself over the hard standing, even though there is no soil for it to root into. 

It's amazing, really, it looks just like proper grass but it is only an inch deep. And it's insidious - you don't notice that your patio or path is getting smaller and smaller.

In fact, in one garden, I found that whole areas of the lawn had 1970s crazy-paving underneath them, including a yard-wide path that ran diagonally across the garden. 

You would never know that it was there, just an inch below the surface of the grass! It was very handy when they decided they wanted a pathway around a raised bed so that they could get to the bird feeder with slippers on: they asked me to lift the turf so that they could get their builder to lay a proper path, and were amazed to come out ten minutes later to see that not only had I lifted the turf, I had “magically” produced a path as well.

So, to get back to paths and patios: all you have to do is get a hand tool underneath the loose edge, and lever up the carpet of grass until you can see the edge of the slabs. Then cut the “carpet” with scissors or secateurs. I usually press it down with my foot, after cutting it all, to get a more natural-looking edge: and once you get it clear, it's easy to run round with the edging shears once a month or so, to keep it back.

Sometimes you find that the grass is rooting itself along the joints of the patio, which is a sign that it's time to re-grout: but it's usually easy enough to pull the grass out from the cracks.

So there you have it - how to (almost) instantly enlarge your patio! 


Did you enjoy this article? Did you find it useful? Would you like me to answer your own, personal, gardening question? Become a Patron - just click here - and support me! Or use the Donate button for a one-off donation. If just 10% of my visitors gave me a pound a month, I'd be able to spend a lot more time answering all the questions!!

Friday 3 December 2021

Good Design (Fail): The Gates of Doom!

Over the years I have encountered many bits of garden design, good and bad, but this one is so hilarious that I thought I'd share it with you today. 


Spot the deliberate mistake: yes, folks, there is a tree EXACTLY opposite the gates to the compost heap. 

And, because of the way they built the gates, and/or the type of hinges they used, this is far as the gates open.

You have to wonder, don't you, about the mentality of fencing firms who, when presented with a run of at least fifty yards of fencing with the instruction "please put in a pair of gates at some point, so we can back up the ride-on mower, to empty the grass cuttings out of sight, onto the waste land beyond the fence", choose to put the gate opposite the one and only tree. 

Could they not see that there was a tree in the way? Did they not have to manoeuvre the gates around the tree while they were installing them? Did they not hear the bit about "we have a ride-on mower and want to back it up to the gates..." ? 

And yes, the owners now have to lift the grass up and over the gates. 

And the gardener - that's me - can just barely squeeze the wheelbarrow between the gate and the trunk, making it really awkward to tip the contents out. 

Can anyone beat this, for bad design?! 


Did you enjoy this article? Did you find it useful? Would you like me to answer your own, personal, gardening question? Become a Patron - just click here - and support me! Or use the Donate button for a one-off donation. If just 10% of my visitors gave me a pound a month, I'd be able to spend a lot more time answering all the questions!!

Wednesday 1 December 2021

Pronounciation - what's in a name?

The other day, I was weeding up some Cinquefoil: you know, that really annoying, stringy, weed that sends out long reddish runners which then root wherever they touch:

Now, most people don't like weeding but I enjoy it for two reasons: it's so nice to see the resulting cleared area once you're done, and it gives my mind plenty of time to wander, and ponder. 

Also, I get paid to do it... 

And on this particular day, I was wondering about the name. Cinquefoil. 

I've never, ever said it out loud. Have you? Should it be "sink-foil", I wondered, muttering it under my breath - but it didn't quite feel right. (The Client's cat was giving me that "why are you talking to yourself instead of me?" look, but I'm used to that.)

Like most of us, I know enough French to recognise that cinque is "five", which fits in neatly with the five-lobed leaves of the plant. So if it's a French name, it should be pronounced Sank-foil, as in the Cinque Ports ("Sank ports"). Not Sink-foil, but Sank-foil.

So far, so bon.

But then, if we agree that the cinque part is not sink but sank, then what about the foil? It shouldn't be "foy-ull", should it - how do you pronounce foil in French? Something more like "fwaa", perhaps? Sink-foil, or sank-fwaa?

I'm still not sure!


Did you enjoy this article? Did you find it useful? Would you like me to answer your own, personal, gardening question? Become a Patron - just click here - and support me! Or use the Donate button for a one-off donation. If just 10% of my visitors gave me a pound a month, I'd be able to spend a lot more time answering all the questions!!

Monday 29 November 2021

The trouble with feeding the birds....

...especially if you offer seed, to attract finches....


 .... as I was doing, last winter: here's my seed feeder, hanging on the fence and extremely popular with the little birdies, as you can see by the low level of the seed in it.


So what is the problem?


The problem is.....


... that you get a forest of"crop" seedlings underneath it - particularly if you have shingle, which is apparently the perfect growing medium for birdseed!

Lovely, huh?

I see this repeated everywhere I go, even when people buy seed which has been treated and is allegedly "non germinating".

Even if you position your bird feeders on a patio, you will still find that the seeds will grow - in the cracks or joins between the slabs, usually, which can be very ugly, and quite destructive.

Sometimes it can be interesting: for example, one Client asked me to move her birdfeeder to a different position, and to dig over the bed on which it stood, replanting the area with some perennials.

Two weeks later, these guys started popping up:

How exciting! 

What on earth are they?

Yes, I know what they are really, I'm just trying to build some suspense...

It's Nicandra physalodes, commonly known as Shoo Fly. I don't know why. They don't repel flies.  Cursory internet research suggests that no-one else knows why, either...

If you're not familiar with this plant, well, it's a weed, properly speaking, although you will find the seeds for sale, bizarrely. It's not particularly attractive to bees:  the flowers - which are blue, and moderately attractive - open for a short time, just a couple of hours, then they are done: and the plant itself can get quite big, but is also quite lax, so it ends up flopping around all over your bed. 

So it's not really a "worthwhile" plant in the garden.

But it was interesting to see it, along with various cereal crops - millet, wheat (that was exciting!), and several that I couldn't immediately identify, and didn't dare leave for too long, as they were getting quite big. 

There is a case to be made, for leaving some of them to grow, then harvesting the seeds... free bird food! But most of the time, they are just scruffy, untidy weeds, cluttering up your border (or in my case, my shingle) and detracting from the general beauty of the garden.

And what is the moral of this tale?

I won't be feeding the finches, this year. I'll stick to fat-balls in cages, for the little birdies which I like to see - I always laugh at the sparrows, pretending to be blue tits:


..but if you want to attract birds but not plants, then here is a quick summary of how to reduce the mess, and reduce the amount of weeding you might have to do.

Firstly, buy the right product:- 

Niger seed is sterile, so it won't germinate.

Fat balls/suet logs or slabs = no germination. Presumably the seeds within in have been cooked...

Meal worms = do not grow into plants! 

Sunflower hearts/hulled sunflower seeds = processed, so they won't germinate

Avoid cheap bird seed, it will have a high proportion of cheap "filler" seed such as Milo, and Millet: avoid Milo in particular, as birds tend not to eat it! It's a type of grass, the seeds look very similar to Millet.

Choose a "no mess" bird seed: they remove the husks and other bits of inedible material, so the birds don't have to rootle through it (flinging it about as they do so) in order to reach the good stuff.  Allegedly.

So there you go, some simple advice on how to feed the birds this winter, without spending the whole of next year weeding!


Did you enjoy this article? Did you find it useful? Would you like me to answer your own, personal, gardening question? Become a Patron - just click here - and support me! Or use the Donate button for a one-off donation. If just 10% of my visitors gave me a pound a month, I'd be able to spend a lot more time answering all the questions!!

Saturday 27 November 2021

Plant Supports: when and why to remove them

Winter - ah, a time to rest and reflect.

Not for us Professional Gardeners, it isn't!

We're rushing around like mad things, clearing up the debris of autumn, removing rotting foliage, mending fences, implementing some of the changes and improvements that we thought of earlier in the year, fixing problems that were spotted weeks or months ago, pulling dead wood out of the shrubs, clearing out the veg patches, and generally getting around to all those jobs that we didn't have time to do in summer.

We also have a long list of annual late-autumn/winter jobs to get through: greenhouse emptying and cleaning, winter pruning for the Roses, and the Wisteria, taking down runner bean wigwams in the veg beds, tidying things up generally, and so on.

One of these jobs is to remove the plant supports which have done their duty throughout the summer, holding our perennials in place so that we can appreciate the flowers.

But now their duty is done, and it's time to clear out the dead perennial upper growth, and tidy up the garden generally. This usually means removing the plant supports.

Or does it?

Let's take a look at why we do this - firstly, why do we remove the supports, over the winter?

1) they are not needed.

2) they are not pretty to look at, especially if they are home-made cobbled-together structures of canes and string, or if they are ancient, rusty, bent, horrible old things.

3) they poke you in the face when you are trying to weed around them.

4) they get in the way when you are trying to rake up autumn leaves etc. 

5) it gives us a chance, or a reason, to look at them and check that they are still firm, and solid, and not ancient, rusty, bent, horrible things, as in point 2).

But are there any reasons for leaving them in place? Well - yes, and here are a few that I can think of, off the top of my head (you can probably think of more, if you tried...).

A) It was such hard work getting them firmly in place, that we don't want to have to struggle with it again next year.

B) Every time you push plant supports in, there is a risk of damaging the roots of the plant you are trying to support: this is not important with fibrous things like Asters, but can be important in tuberous plants, such as Peony, or Dahlia (if you leave them in the ground).

C) If we take them out, we have to store them somewhere over the winter, and we don't have much room: plus, they might get lost, or damaged.

D) It's a faff, and we can't be bothered.  (NB This is NOT a "good" reason...)

E) (Hint: this is the "best" reason:) It marks where the plants are, so that we don't accidentally dig them up when - for example - tackling bindweed or some other pernicious weed, or if we decided to change something in the area. It also helps us to avoid treading on their new shoots next spring, when we are deadheading the bulbs and stomping around on the beds.

So what is the solution to this dilemma?

Answer: buy beautiful supports!

I particularly like these ones:

They are sold as Peony supports, for which they are perfect, as the splayed-back top layer gently supports the heavy flowers.

But of course they work pretty well for anything else which grows upwards, then flops over.

And in winter, they are easily beautiful enough to leave in place.

It's quite hard to find these particular ones: they are made by "Tom Chambers" and this one is called the Cottage Garden Herbaceous Basket.

There are a lot of imitations around - as you would expect! - but the ones I dislike are where, instead of the basket top, you have a row of knobs.

Here's some I found in my local garden centre:

As you can see, they appear to be very similar to the desirable one, above: but beware, those knobs stick out a long way around the base (if you see what I mean) and they will poke you, when you get too close.

This makes weeding and deadheading a bit tricky!

But they are still elegant enough to leave in the garden over the winter, which neatly cuts out objection number 2), above.

So there you have it, reasons to remove, reasons to retain: now it's over to you, to make the decision!


Did you enjoy this article? Did you find it useful? Would you like me to answer your own, personal, gardening question? Become a Patron - just click here - and support me! Or use the Donate button for a one-off donation. If just 10% of my visitors gave me a pound a month, I'd be able to spend a lot more time answering all the questions!!

Thursday 25 November 2021

Hellebore leaves: time to burn them!

Bonfires - love them, or hate them, they are far and away the best way of disposing of infected plant material.

After all, if you put it in your Green Waste Bin and send it off to the council, what do you think happens to it? Here's the answer: it gets turned into soil conditioner. Which is not quite compost... but nearly. What's the difference? Compost contains nutrients:  soil conditioner may contain less in the way of nutrients, but still does wonders for the physical "construction" of the soil, making it better at retaining water, and opening up the structure of dense, clay soils, making them easier to work.

But I digress! (which will not surprise regular readers at all...)

If you put diseased material into your council green waste bin, it gets processed along with everything else, and ends up being spread on a field somewhere. The chances of disease lingering in the material are low: the council have developed the process specifically to avoid that sort of thing, but still, it's not a risk I'd care to take. 

So I would much rather burn the diseased material, then use the nice sterile ash for various purposes around the garden. More of that later.

In particular, at this time of year, I'm talking about Hellebore leaves... Helleborus orientalis, the low-growing winter-flowering perennial, found in most gardens, very popular, and rightly so. But the leaves don't rot: or, should I say, they don't rot quickly or easily. I know this, because I did a little experiment for myself, in which I established to my satisfaction that no, they don't rot.

So here we are: it's autumn, we're heading into winter,  the Hellebores are all looking terrible, and if  you haven't already done so, it's time to go out and cut off all those horrible brown, dead, diseased-looking leaves.

Why?

Well, for a couple of reasons: firstly, and horticulturally speaking,  most Hellebore leaves harbour a nasty disease which causes brown/black areas, they start as spots, and gradually spread over the entire leaf. Unsurprisingly, this is called Hellebore Leaf Spot.  It is caused by the catchily-named fungus Microsphaeropsis hellebore, and like all funguses (fungi?) it spreads by spores - so it's far better to get rid of the infected leaves before the spores are released.

Secondly, they look disgusting (left).

Thirdly, and possibly even more importantly than secondly, they will obscure the flowers! The leaves of most Hellebores are actually taller than the flowers, and that's a real nuisance because, after all, we plant our gardens with flowers, because we want to admire the flowers! We don't want to have to stand over them and rummage around, in order to see a glimpse of a petal - no, we want to see the flowers in all their glory, so this is a case where The Leaves Must Go.

Oh, and fourthly, by removing the bulk of the old leaves, you will find it much easier to rake out the fallen deciduous tree leaves, which otherwise catch in amongst the Hellebore leaves, making the garden look untidy and dilapidated. 

In most of "my" gardens, I am either instructed, or permitted, to cut off all the Hellebore leaves at this time of year. In one or two, I am asked to only remove the leaves which are actually brown and horrible-looking, and to leave any which are still green.

This is a nuisance, because it means that in a few weeks' time, I will have to go round them all again, and cut off those last few leaves, which will have gone brown by then. 

But it's also a good thing, because it shows where the Hellebores are, which prevents people treading on them, not knowing that they are breaking the flowering stems before they can fairly start growing. This is important in a garden where people routinely walk across the beds.... or have dogs.....

And then, in a few short weeks, we'll start to see the flowers pushing through: and without the covering of old, tired, leaves, we will actually be able to see them.

Meanwhile, get those old, diseased, horrible leaves onto your bonfire pile, and do this to them (left).

*Proprietary Warning* when I do bonfires, I never just set fire to the pile: what you can't see in this photo is that the dead material was piled a couple of feet away, behind me: so I move a few armfuls onto the bonfire patch, get it going, then pile forkfuls on top as it burns.

This gives all the woodland critters a chance to run away, having been disturbed by me rootling around in the bonfire heap, and gradually moving it over to the burning pile. 

Which is far better, for them, then being roasted alive, which is what happens if you just set fire to a huge heap of rubbish, without moving it first... hang on, I must have a photo somewhere:

There we go - my bonfire place is a burnt black patch, and I pile all the burnable stuff to one side of it.

Then, when I'm ready to burn, I move over some of the oldest, driest material - note the pitchfork stuck in the ground on the left, there - onto the blackened patch, and get it going.

Once it's good and hot, I can throw on the less-dry material, the more freshly-cut stuff, and it will still burn.

This is another advantage of doing it this way, rather than just shoving a match into the bottom of your heap - the inner, lower layers might be damp.

Oh, and a third perfectly good reason for doing it this way, is that you can keep the actual burning pile down to a reasonable size, so it doesn't get out of control. I arrived at one Client's garden, one winter's day, to find fire engines all over the place: the neighbour had accumulated a large pile of stuff to burn, and had simply set the whole thing on fire, and it had got out of control and set fire to the hillside. 

Eeek"

So, children, when planning to burn off your non-compostable garden rubbish, always stack in one place and burn it in another, for the benefit of wildlife, to make it easy to get going, and to keep it under control.

Then, when the burning is all over, and the pile has cooled down, you are left with a pile of sterile ash: this can be spread over the winter-cleared veggie patch, and dug in - it can also be used on garden steps, the sort in the shade where the grass won't grow:

Here's some I did earlier: they are just hard-packed earth with wooden risers, in a situation where it is far too shady for the grass to grow, but plenty of weeds managed it. *rolls eyes*

An annual application of bonfire ash keeps the weeds down, and because ash is gritty, rather than muddy, it's much easier to pack it down firm with your boots.

This keeps the steps "full", as it were: the earth tended to sink, so that you'd trip over the wooden edges. But once I started packing them with ash, this problem was much reduced.

Well, I seem to have strayed from the subject of Hellebore leaves, but there you go, two for the price of one!


Did you enjoy this article? Did you find it useful? Would you like me to answer your own, personal, gardening question? Become a Patron - just click here - and support me! Or use the Donate button for a one-off donation. If just 10% of my visitors gave me a pound a month, I'd be able to spend a lot more time answering all the questions!!

Tuesday 23 November 2021

How to deal with overhanging tree branches: small garden trees

For some reason, I've had a lot of people all asking me the same question, this year: what do we do when our neighbours' trees are hanging over the fence onto our side, and we want to get rid of them?

I am guessing that this is in response to C-19, with a lot of people spending time in their gardens:  people who maybe didn't previously use their gardens very much?

And suddenly they are noticing how much nicer the garden would be, if it wasn't being invaded or overshadowed by next door's trees!

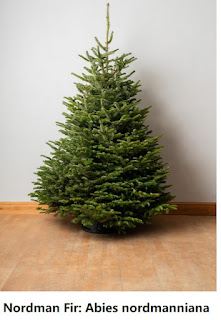
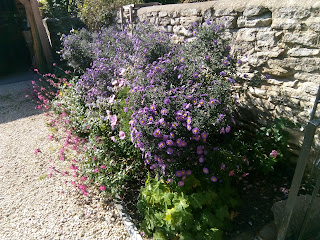
Hedges are one problem, and I'll save that for another post, but trees are quite easy to deal with. For the purposes of this article, we'll assume you are talking about smallish trees, or shrubs, which are just putting a few branches over to your side, and which are small enough for you to feel that you can tackle the branches with a pair of loppers or maybe a small hand saw.

Anything larger than that, and  you will need to get a tree surgeon involved, but for now let's assume it's just a couple of branches of a smallish tree.

Firstly, the legal situation

The law says that we are allowed to prune off overhanging branches, but they belong to the neighbour. Especially if they have fruit on them - the produce belongs to the neighbour. 

Technically, all overhanging fruit, including windfalls, belongs to the owner of the tree, not the person on whose lawn it drops, but no-one would ever try to enforce that. 

(mental image of laboriously picking up every single windfall, wasps and all, and launching them back over the fence...)

However, we can't just post them over the fence - that's fly tipping.

Properly speaking, you have to present them - cuttings and/or fruit -  to the neighbour, and ask them if they want them: and if they do not, then you have to dispose of them. 

So what is the correct way to deal with it? 

You should approach the neighbour, before doing anything, and tell them that the branches of their tree are intruding, and you want to have them removed: ask the neighbour if they would prefer to do this work themselves, or would they be happy for you to do it, and dispose of the cuttings.

Always make it sound as though you are just trimming: don't use the word chainsaw, removing, tree surgeon, or cutting: just say "trimming a couple of bits off".

If you are lucky, they'll say "oh dear, terribly sorry, I'll get my gardener/handyman to sort it out straight away."

If you are nearly lucky, they'll say, somewhat huffily, "I don't see any problem?" at which point you invite them to come round into your garden and see for themselves. Usually, when they do this, they then say  "oh dear, terribly sorry, I'll get my gardener/handyman to sort it out straight away."

If you are unlucky, they will shrug, say "Wotever," and refuse to discuss it, in which case, you go straight to "Lastly: If all else fails..." below.

Legal situation Part II: Conservation areas

You should already know if you live in a Conservation Area: but if you are not sure, look it up online: type in the words "conservation area" and your county, and you should find links to maps which show you where the conservation areas are.

I was quite surprised when I did this: I had assumed that Conservation Areas were only, I don't know, nature reserves, or roads with historically important buildings, but this is not the case, and almost every town and village has a Conservation Area or two.

Here are the Hanneys, East and West, two villages near where I live:

As you can see, West Hanney has one block - edged in red, shaded in pink - of Conservation Area, while East Hanney has one large block, and one little isolated bit.

It is quite fascinating, for a rainy day, to find your county's map, and have a look around where you live!
 

Normally the Conservation Areas are in the older parts of the town, or village, but now that housebuilding has been allowed to creep in all over the place, there are some surprising anomalies, such as this one, where some new houses were built at the edge of a conservation area, so part of their gardens is within it, and part is outside it:


 You can see, on the right-hand edge of the box jutting out to the right, that the (new) houses are inside the shaded area, whereas the bulk of their gardens are not.

I doubt that many of them even know about it! 

But it means that if they want to do any work - pruning, trimming, anything - on any tree or shrub whose stem measures more than 7cm (ie about 3") at 1.5m above the ground (ie about breast height) within the part of the garden which is inside the shaded area, ie the front gardens and the bit of the back garden closest to the house, then they will have to apply for Planning Permission. 

Yes, really! I'm not kidding, living in a Conservation Area means that you CANNOT prune any tree or shrub above the size mentioned, without obtaining Planning Permission first.

So it's well worth checking this out, before you do anything.

Right, moving on from the legal side:

Secondly, the physical side of it: 

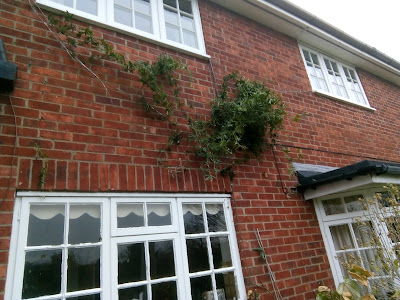
It's worth pointing out that (legally) we are only allowed to cut back to the actual point where they overhang our boundary, which can result in something really ugly from our side, and bad-for-the-tree (horticulturally speaking) on their side.

What I mean is, if you drew a line vertically upwards from your fence, and cut off everything at that point, you'd end up with a lot of amputated stumps to look at, each of which would either die - very ugly - or would produce a clump of vigorous shoots, thus making the problem worse for future years, as well as looking a bit peculiar.

The correct way to do it, would be to assess each of the trespassing tree limbs in turn, and either cut them back to the trunk, leaving a neat wound that will heal cleanly: or to shorten them at a point which retains the "form" of the tree.

It's often worth pointing this out, in the hopes that the neighbour will take the sensible decision to do their own pruning, in order to control what is cut.

Thirdly, the moral side of things:

When dealing with any sort of boundary issue, the first rule - as discussed in this post about invading brambles -  is "Don't fall out with neighbours if you can possibly avoid it" which usually means talking to them, preferably before you get really cross about it, and definitely before you do the chopping!

If you already have a reasonably friendly relationship with the neighbour, all well and good: but if you are a bit distant, or - worse - if you've already had a bit of friction, then it can be hard to go and speak to them: but it's worth gritting your teeth and accepting that part of being a grown-up is having to do things you don't really like doing.

Approaching them in a fighting spirit is NOT the way to get it done: a calm approach along the lines of "I wonder if you'd be kind enough to.." or "Hi there, you might not be aware of this, but your [insert name of tree] is overhanging our side quite badly now, and I wonder if you'd be kind enough to ..." is much better.

Sometimes a pre-slaughter approach, along these lines, can prevent years of low-level war and bad feeling...

Lastly: If all else fails...

If they refuse to talk about it, slam the door in your face, or say they'll see to it, but never actually do it, then you will have to do it yourself, in which case I would advise dropping a note through their door to notify them that you will be carrying out this work on the [insert date] and that if you do not hear from them before that day, you will assume that they are happy for you to do the work and dispose of the cuttings.  Take a copy of this note - take a photo of it - to prove that you have notified them. Then get out there and do the work yourself. (Or get someone in to do it, obviously.)

And yes, obviously it's "unfair" that you will have to deal with disposing of the bits you cut off, but sometimes it's a small price to pay, in order to get rid of the annoying or intruding branches.

So there you have it: overhanging branches of smallish trees, how to deal with them. Always try the "nice" approach first, and strive not to let it escalate into war!


Did you enjoy this article? Did you find it useful? Would you like me to answer your own, personal, gardening question? Become a Patron - just click here - and support me! Or use the Donate button for a one-off donation. If just 10% of my visitors gave me a pound a month, I'd be able to spend a lot more time answering all the questions!!

Sunday 14 November 2021

How to: Keep your feet warm in winter!

 Oops, I've just noticed that I haven't added any new articles for over a week - sorry everyone, I've been busy!

It always makes me laugh, when non-gardeners say things like "what do you do, in winter, when there's no work to be done in the garden?"

Hollow laugh, said she, rushed off her feet, trying to squeeze in all the extra jobs with the days getting shorter...

Anyway, a quick post today: cold feet.

Yes, we all suffer from this, some of us more than others. Trying to work with frozen toes is miserable, and takes all the joy out of working outside, and we had our first hard frost a couple of days ago, which means we were standing on icy-cold concrete, and trying to keep off the frosted grass, because if you walk across hard-frozen grass, it breaks the stems, and in a couple of days, there will be crushed, brown grass all over the lawn.

In this case, it wasn't really a hard frost, but was enough to make our boots wet, and our toes cold.

I wasn't too badly off, because I wear thick thermal socks, and I have extra insoles in my boots. Not the useless lambswool ones, I find they don't help at all, and after the first wear, the fluffy wool has packed down hard, so they're not exactly "trapping a layer of warm air" any more.

No, I use this type of insole, the sort you get in walking boots:

They slip inside your boots, over the existing insoles, and give you a layer of extra padding ("ooh! Comfy!") and because they are made of similar material to those camping mats, they are well insulated, so they help to stop the cold striking up through your soles.

So between them, the thick thermal socks, and my practice of doing some vigorous raking of leaves as soon as I arrive, I was moderately warm, right from the start.

My colleague was not so lucky, and was suffering with really cold feet.

Afterwards, being a helpful soul, I did some research into chemical hand and foot warmers: I've already discovered these wonderful gadgets for warming hands:

These are not for work - but I've found them to be great for standing around outside: and for going on long walks in winter, they can be slipped inside your gloves, keeping your hands nice and toasty.

"I wonder if they do them for feet?"

Yes, they do: but they seem to be small pads to go under the heel, or just under the toes, and I thought they would spend their whole time migrating up and down inside my boots, which would be annoying.


Further research found these ones, right:  which go under the whole length of the foot.

They are "single use" which is not very eco, but frankly they are wonderful! 

I found that if you take them out of your shoes/boots when you don't need them, ie lunchtime, and put them together face-to-face, then seal them inside a grip-top plastic bag, ie to exclude air, then they cool down and go inactive. 

After lunch, open the bag, slip them back in the boots, and in a very short time they are warm again.

Day 1: super warm, almost "hot" and, as it was not a particularly cold day, I was so hot all over by mid-morning that I took them out. I was down to working in a tee-shirt by then, I'm not sure how much "hot feet" contributed to that, as opposed to "working hard". After an hour or so, I put them back in!! Standing on wet grass was quite cold to the feet...

After work, I put them back in the plastic bag.

Day 2: opened the bag, flapped them about a bit to let the air get to them, hey presto, gentle warmth. Back in the boots, out we went, a second day of much more gentle warmth, but very pleasant. They were starting to feel a bit lumpy underfoot, but I found that I could squeeze any lumps between my fingers, and crush them. They appear to be granular.

Day 3: repeated day 2 - still some gentle warmth! Much less so, but enough to take the chill off the cold wet ground, and I was super-cosy all day long. Had a few "Princess and the Pea" moments, as they were definitely getting more granular underfoot, which necessitated a bit more squeezing and crushing with the fingers.

The instructions say to take them out for 15 mins every 3 hours to reactivate them, but they are so super-warm that I found that quite unnecessary.

And as you saw, they are very slim, and don't take up any room to speak of, inside the boot.

All in all, better value than expected, well worth it, even as a single-use item. Next time, I'll slip them straight into my boots and put the boots straight on, to reduce their exposure to the air, to extend their use.  Who knows, I might even get four days' use out of them!!


Did you enjoy this article? Did you find it useful? Would you like me to answer your own, personal, gardening question? Become a Patron - just click here - and support me! Or use the Donate button for a one-off donation. If just 10% of my visitors gave me a pound a month, I'd be able to spend a lot more time answering all the questions!!