Tuesday 29 September 2020

Complimentary foliage: Tamarisk and Asparagus

I know, not a combination that you are likely to find in any books on garden design: but I was struck by this attractive juxtaposition, which I found in a Client's garden last July.

On the right of the path, a large Asparagus bed. 

Now, we all know that Asparagus is a permanent crop, apparently it's quite desirable (despite the horrible smelly side-effect!) because it is one of the earliest fresh green veg crops of the year: we harvest it in “early spring”, which in real life means late April through May. Although personally, I'd call May “late spring”.... anyway, it's an early crop, and then we forget about it until autumn.

But look what lovely fluffy foliage it sends up!

And on the left, a Tamarisk: this is a deciduous shrub or small tree, which has the added benefit of producing pink flowers, usually in spring.

And look what lovely fluffy foliage it has!

Veggie gardens are not usually the most attractive of things, and when I first saw this garden (in winter) I was a bit surprised to find a bed of Asparagus out in the main garden, rather than tucked away in the kitchen garden section.

But once we stopped cropping the Asparagus, all became clear. 

So there you go: a nice, interesting, and unusual combination of planting to give a lovely balanced effect throughout the whole summer.

And frankly, as I'm not at all fond of eating Asparagus - to me, it just tastes “green”, like eating pea pods or the stalks of broccoli - I might even start planting it in borders, just for the tall feathery foliage! 


Did you enjoy this article? Did you find it useful? Would you like me to answer your own, personal, gardening question? Become a Patron - just click here - and support me! Or use the Donate button for a one-off donation. If just 10% of my visitors gave me a pound a month, I'd be able to spend a lot more time answering all the questions!!

Sunday 27 September 2020

Ground Elder in the Rose Bed

 Oh no! 

Panic, scream, and run around in circles - there is Ground Elder in the Rose bed!

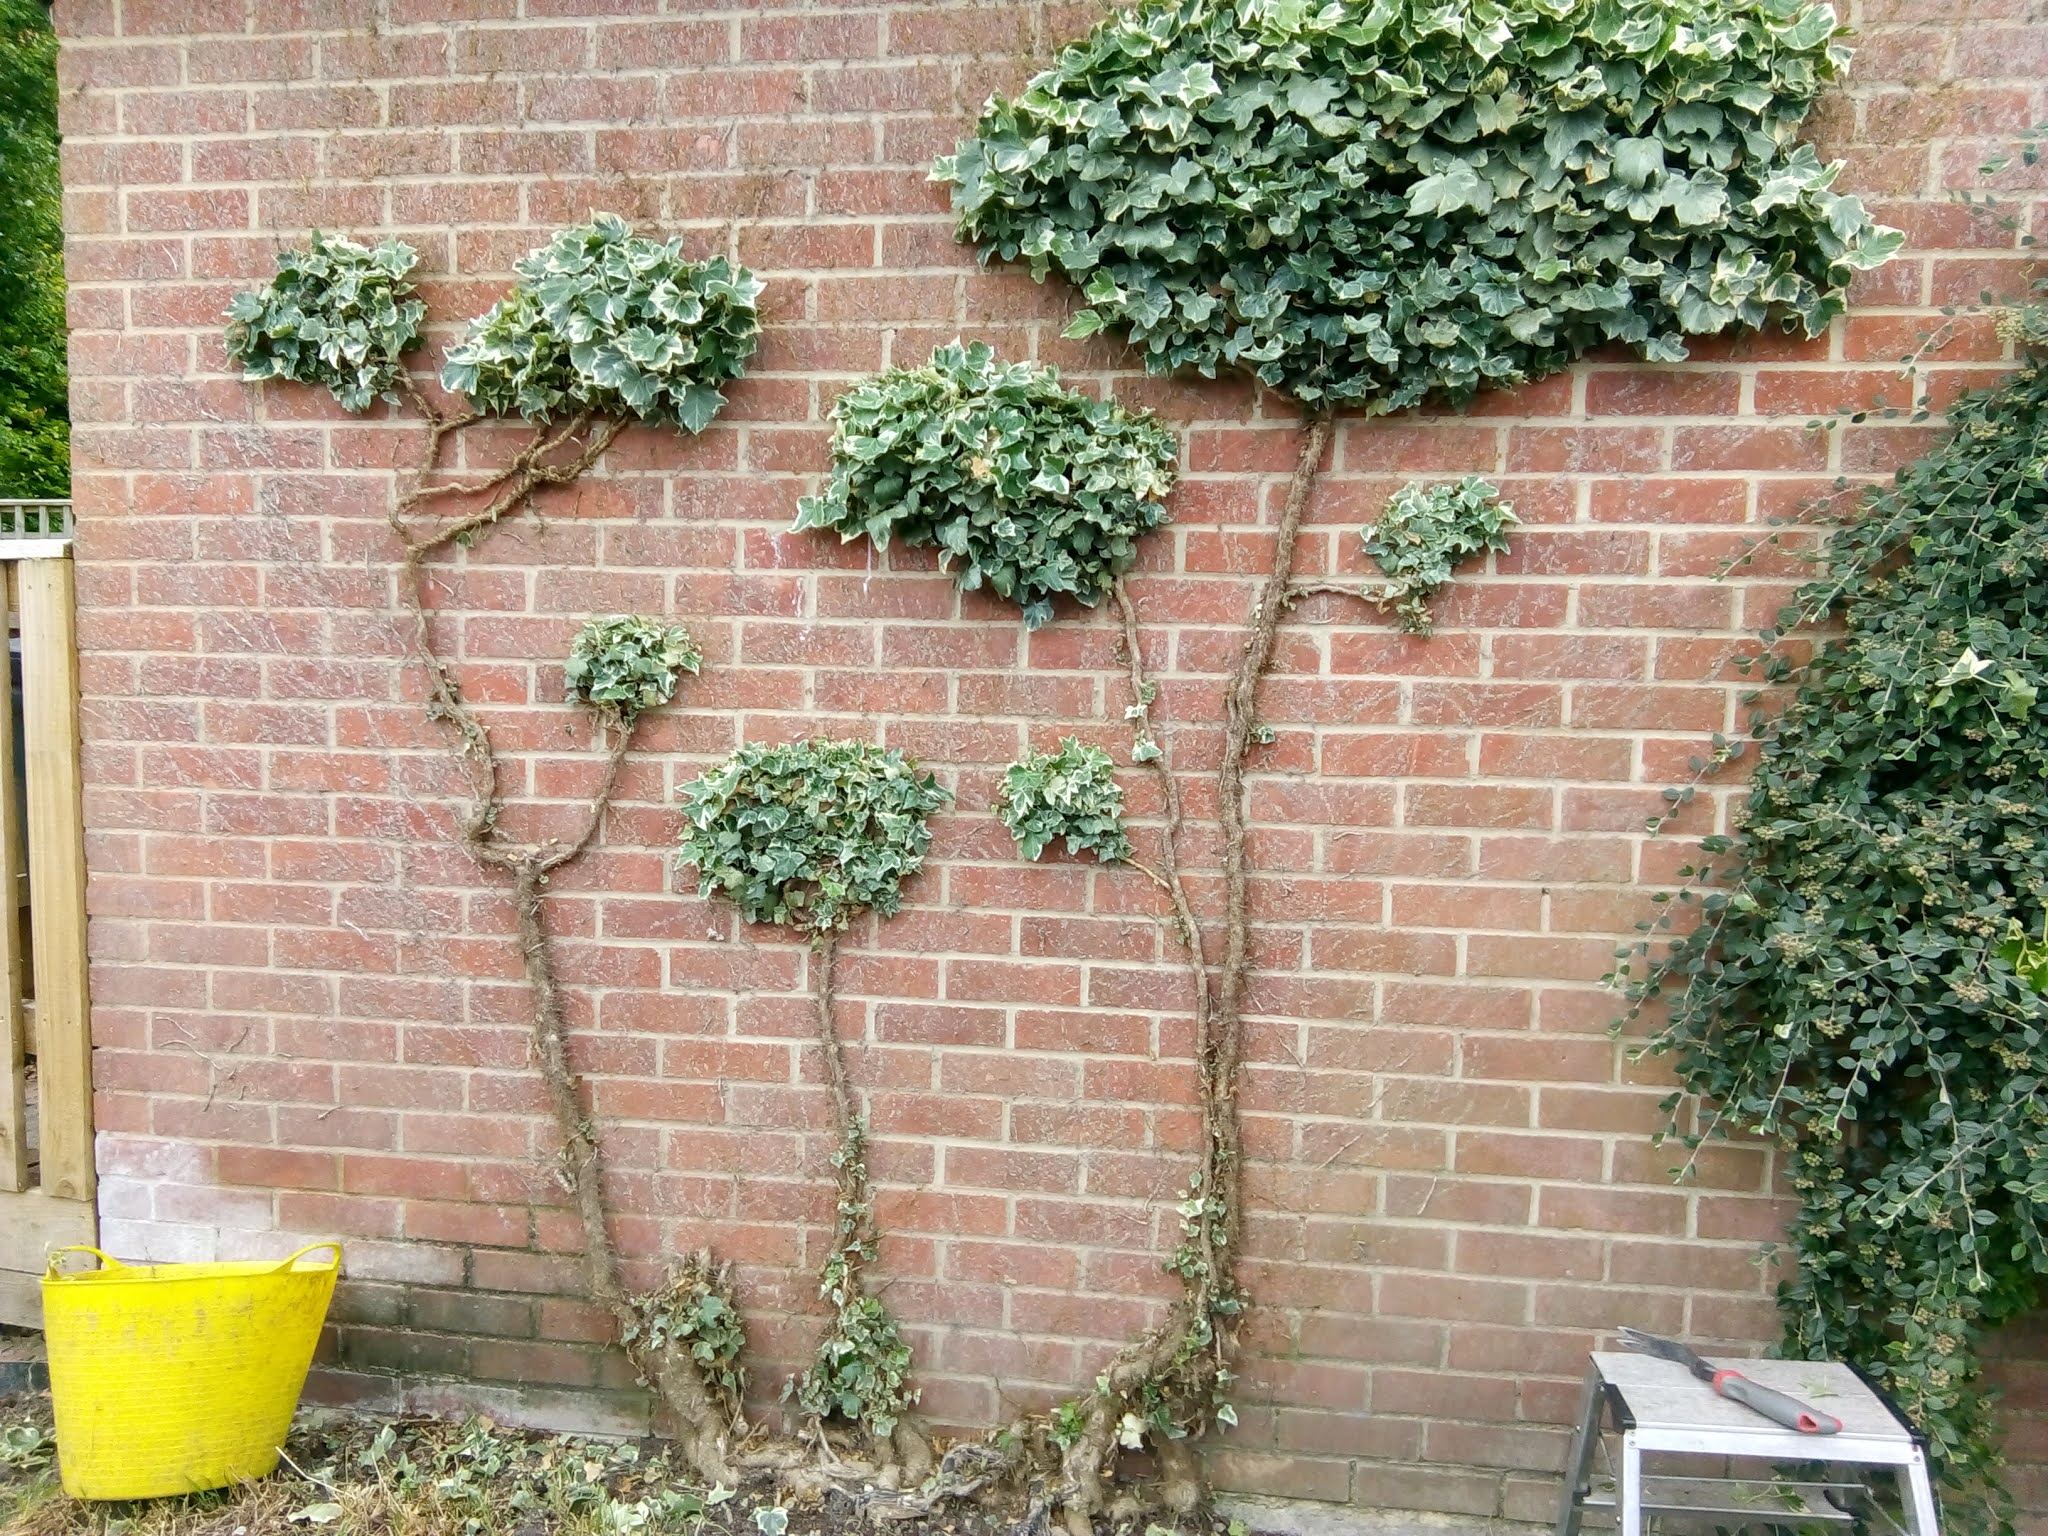
This photo - left - is fairly typical of the sort of problem I am offered, when I go to look at a "new"garden: the owner says that they have tried for years to get rid of it, but have failed, so can I please do it for them.

They then give me the puppy-eyes, so the next thing you know, there I am, digging for victory.

There is only one way to truly get rid of Ground Elder (and Couch Grass, and Bindweed, for that matter - the Terrible Trio as I call them) and that is to dig them out.

I've covered this problem in depth, in this article about Ground Elder, so if this all looks horribly familiar, I'd suggest you go and read that one first.

Right, are you back?

So, the easy answer is to lift all the plants, dig out the filthy stuff, then replant.

Oho, not possible with established roses though!

So what do we do?

Firstly, I'd take a good close look at that cluttered growth, and see if there are any plants worth saving: often, what appears to be a sea of Ground Elder can conceal some treasures.

If you find any, dig them up first: have some buckets of water handy, so that once you have cleaned all the soil off their roots - and that way, you can spot and remove any Ground Elder roots - you can plunge them into the water, so they stay alive and safe while you work on the bed.

Then, dig out as much of the Ground Elder as you can, as per the post mentioned above. Obviously you won't be able to get it all out, because the roses will be in the way: but once you've dug out the Ground Elder all around them, thus loosening the soil, you should be able to get on your knees with a daisy grubber and "winkle out" the last few bits. 

The trick is to avoid just heaving on the Ground Elder roots, because if you do, they will snap. And then they will re-grow.

Instead, you need to gently pull them through the soil, and this is where "loosening the soil all around the rose" becomes important.

This sort of job is much, much easier if you can do it at the "right" time of year. 

"When is that, Auntie Rachel?" I hear you ask. (*laughs*) (I'm laughing because I'm talking to myself now! Isn't that the first sign of madness? Or is it when you start hearing answers?)

It's a trick question - it's not so much the right time of year, meaning the first week in April, or the middle of September: it means doing it when the soil is in the best possible condition for digging.

There's an old saying, in horticulture: Weed when Wet, Dig when Dry. It's a bit of an over-simplification, of course, but the point is valid: digging wet soil is hard work, heavy going, messy, ruins the soil structure, breaks your back, makes a mess all over the lawn: you get the picture.

Of course, here in Oxfordshire, "Dig when Dry" doesn't always work, as we have a lot of clay, which can turn into concrete overnight, with the addition of those lovely Serengeti-like cracks. However, most garden beds and borders have had mulch and compost added to them over the years, so clay soil has - usually - been improved to the point where you can indeed dig it when it's dry.

So, generally speaking,  a big job like this is best done when the soil is fairly dry, but not rock-hard - preferably when it is still crumbly. That way, it's easier to dig, lighter to move around, cleaner to work with (no platform boots, no muddy prints on the lawn) and the roots of the Ground Elder will slide out, rather than snapping off.

Once you've cleared the bed, dig it again! You will always find more bits of root, and if there is time and energy, I always recommend digging a third time. Trust me, you will keep finding bits that you missed the first two times!

Having finally cleared it, you can now look at replanting: but when it comes to roses, I never like to plant too much around them, for several reasons:

1) They need regular dead-heading, so I find that with roses, I am constantly treading on the beds to reach them. This is not good for the plants clustering around their feet.

2) Plus, all the books will tell you that "Roses are greedy feeders" which means that they don't like competition: there is a reason that so many of the big posh gardens have rose beds with nothing but roses in them. 

3) It also means that if you feed your roses, as you should, then any planting below them will also benefit from the feed, which will worsen the competition.

4) Roses suffer from a few diseases - Black Spot is a major one, mildew too, and in both cases, good air flow is important to reduce the spread. So having a clutter of planting below and through the roses, as per the photo above, reduces airflow and makes them more susceptible to disease.

5) If you keep the rest of the bed clear, you can hoe around the base of the roses. This is a very quick way to remove weeds. I'm not a big fan of hoeing, for all the reasons in that article, but they do have a use in a rose bed.

6) Ground Elder (and Couch Grass, and Bindweed...) is/are persistent, so even though you have spent three hours digging it out, It Will Be Back. There will inevitably be small bits of broken root,  left behind in the soil, which will sprout cheeky little new leaves over the next couple of weeks. However, having dug out all the interconnected yards of roots, these little bits are easy to get out with the faithful Daisy Grubber. But doing so is much, much easier if you can see them as soon as they pop up. 

7) "Roses are greedy feeders": so every year, you are going to need to give them a good deep mulch of organic matter or home-made compost, and this is much easier if you can just spread it over the entire bed, without having to fiddle your way between lots of herbaceous plants.

8) Just to repeat reason number one, if you want to keep your roses in the best possible health, and flowering "down here" where you can see them, as opposed to "way, way up there!" where you can't,  then you will need to deadhead frequently and properly, and that means being able to get close to the plants, and to get all round them. 

So, once you have finished clearing the bed, instead of replanting your rescued plants back into the rose bed, see if you can find other homes for them, and leave the roses in solitary splendour.

Once you are sure that no Ground Elder is going to pop up - this may take several weeks of checking carefully, until you are pretty sure you got it all - you can either spread a thick layer of decorative mulch such as bark chips, or just leave it bare. 

If the Client really, really wants some underplanting, then I'd suggest going for something very low growing: good ground cover plants such as Primroses, which will brighten it up in spring, long before the roses start: or something like Ajuga reptans (Bugle) especially the dark purple-leaved one. This makes it impossible to hoe, but at least it doesn't impair air flow, and you can  hard-heartedly tread on them, in order to prune.

So there's the story - how to get Ground Elder out of your rose bed, for once and for all - we hope!


Did you enjoy this article? Did you find it useful? Would you like me to answer your own, personal, gardening question? Become a Patron - just click here - and support me! Or use the Donate button for a one-off donation. If just 10% of my visitors gave me a pound a month, I'd be able to spend a lot more time answering all the questions!!

Friday 25 September 2020

Pyracantha: how to get it covered in flowers

 I have a love-hate relationship with Pyracantha, or Firethorn, as it is known: I love the look of it, but hate working with it...

.. because it is covered in lethally sharp spikes... before you ask.

I was asked recently, by a neighbour of one of my Clients, how they could get their Pyracantha to flower as much as "ours" does - I had no idea that they were seething in  envy, every time they walked past, mwah haa haaa! (*maniacal laugh*)

The answer is deceptively simple - Pyracantha is one of those few garden shrubs which respond to pruning by flowering more and more: it seems counter-intuitive, but honestly, the more you prune it, the more flowers - and therefore berries - you will have.

To get the best from a Pyracantha, then, you need to grow it in a situation where you can prune it easily, ie not tucked away at the back of a border: I love them when they are espaliered along a fence or wall, trained to wires and cut back hard.

Here's one I trained up, a few years back when I'd just started it:

This is what they look like in May - you can see that the main branch, which is firmly tied in to stout wires on the wall, has flower buds on it, but it also has a lot of non-flowering new growth: these are the spindly bits, which are sticking out.

These all have to be pruned off, very close to the main framework: they don't bear flowers, and they just clutter up the design, and obscure the flowers on the main branches.

Plus, they make it very difficult to get close enough to prune it!

This is what most people struggle with: they want lots of flowers, so they assume they have to have lots of growth.

Wrong!

The trick, if you can call it that, is to be completely hard-hearted, and to go round several times a year, trimming off all the new growth. Yes, I know that you want a thick, bushy plant that is covered in flowers, but trust me, you won't get one, if you just let it grow and grow.

On the example above, I trimmed off all those skinny little new branches, back in May, again in mid summer, and again in autumn.

One year later, it looked like this:

There you go, thick lush growth all covered in flowers, which will, of course, turn into brightly coloured berries later in the year.

If I'd left it unpruned, it would be a mass of spiky green shoots, and you would barely be able to see the flowers.

And, of course, the path would be half the width that it is now!

How hard can you prune them? Well, you can quite literally allow just one single branch to grow: here's one of the upright sections of this same plant:

As you can see, one single branch has been allowed to grow upwards, and then one single branch has been allowed to grow out sideways along each of the wires, and I pruned them three times the previous year, to remove all fresh growth.

Here we are in May again, covered in flowers.

Over the next year or two, those three horizontal branches will thicken up, but I will still prune out all new growth, and I won't let them get any longer, either: you might just be able to see that this upright is between two windows, so it's important not to allow any further sideways growth, otherwise they won't be able to get the windows open. Or see out of them.

I've asked the owner to put up another couple of horizontal wires, lower down: and once they are in place, I will tie in new growth, one branch per wire, and prune off everything else, so the pattern will gradually spread all over the wall.

"Can it be that simple?" I hear you ask. Yes! It really is that simple!

"But what if I don't have any wires, or a wall to tie it to?"

Well, just prune it anyway. It works just as well with a free-standing bush: in fact, I have some photos of one, so come back in a couple of days and I'll put up a new post with pictures of it.  

If you are a bit nervous about hard pruning, then it is easier to prune to a tied-in framework, because it is very clear which ones you keep. But if you just have a wild, ragged bush somewhere, go out there now and cut off every branch which does not have berries on it. You might be surprised at how much better it looks, afterwards!


Did you enjoy this article? Did you find it useful? Would you like me to answer your own, personal, gardening question? Become a Patron - just click here - and support me! Or use the Donate button for a one-off donation. If just 10% of my visitors gave me a pound a month, I'd be able to spend a lot more time answering all the questions!!

Wednesday 23 September 2020

2020: what a weird year.

 Most people will remember 2020 as being the Covid-19 year, but to us gardeners, it has been the Year Of Weird Plants.

For example, here are some Asters in one of "my" gardens:

Usually they are about waist height - these are tall Asters (Michaelmas Daisies).

As you can see, with my fork for scale, not to mention the greenhouse ("The greenhouse?" "I told you not to mention the greenhouse!"), er hem, they are now taller than I am.


Then there's this:


This is common Honesty, Lunaria annua: normally it's about waist height, sometimes a little less.

This - right - is a 6' high fence, including the trellis section. 

(Which was my idea, by the way: the neighbour put up the fence but it was only 5' high, and my people wanted a bit more privacy. So I suggested bolting a strip of trellis horizontally along the top: and lo! and behold, increased privacy but it let the light through, it baffles the wind, and best of all, it didn't make the neighbour cross!)

As you can see, the Honesty is very nearly up to the top!

Then we have the whole "flowering-out-of-season" thing: 

Here's a common or garden Wisteria, famously a plant which flowers in early spring.

Here it is - right - a week ago, that's the middle of September.

*sigh*


And it doesn't end there: 


 Here's the Kerria - another famously spring-flowering shrub - which not only flowered in March as it was supposed to, but had another go in August.


And talking of August, I have a photo which I took last month:


How weird is that - left? 

24th August, and all the sycamore leaves were falling, the Hemerocallis appears to be done for the year, and the Hellebores are perking up, as though it's already winter!

And don't get me started on fruit and veg: we had not one but four late frosts this year, after a mini-heatwave. So, many people are finding that their fruit trees have very little fruit on them this year, particularly apples, which seemed to bear the brunt of the blossom damage.


So, all in all, 2020 has been a weird year.....


Did you enjoy this article? Did you find it useful? Would you like me to answer your own, personal, gardening question? Become a Patron - just click here - and support me! Or use the Donate button for a one-off donation. If just 10% of my visitors gave me a pound a month, I'd be able to spend a lot more time answering all the questions!!

Monday 21 September 2020

You know that expression "you look like a drowned rat"?

 Well, guess what I found in a Client's watering can the other day.

Oh look!

A drowned rat!

I assume that it clambered in for a drink, fell in, then couldn't scrabble its way out again.

I don't particularly care for rats, but I do feel sorry for any creature which meets this sort of untimely end. 

Before you ask, I know it's a rat because I took it over the road to my friend Dudley, a wildlife expert, and he identified it at a glance. He also commented that it must have been in the water for a long time, because the fur and the tail had rotted off.

Lovely.

Talking of "lovely" jobs in the garden, I was once asked to investigate a particularly smelly water butt: I poked around with a stick, and I thought I could see something under the surface, but I wasn't about to put my hands in, so I emptied the butt out, and found five drowned squirrels. Eeeuw!  Pretty stinky. And that, dear reader, is another perfectly good reason for always putting lids on your water butts, along with keep out the mozzies, and to prevent small children having accidents.

Again, the supposition is that the squirrels wanted to drink, and fell in, and once in, couldn't scrabble their way out. You do think that once the first one fell in, it's squeaking would warn the others away... but apparently not. Or maybe they fell in at different times? 

Eldest Squirrel: "Where's Tiny Squirrel?"

Small Squirrel: "Dunno, went out for a drink earlier. "

Elder Squirrel: " Well, go and find him."

Later...

Eldest Squirrel: "Where's Small Squirrel? "

Medium Squirrel: "Went out to find Tiny Squirrel. "

Eldest Squirrel: "Well go and find the pair of them. Honestly... "

Later.

Eldest Squirrel, in annoyed tone: "Where has Medium Squirrel got to? "

Large Squirrel: "Still looking for Tiny and Small? "

Eldest Squirrel: "Oh for heaven's sake, what's keeping them? Go and look for them, would you? "

Some time later:

Eldest Squirrel: " Honestly, if you want a job done...."


Did you enjoy this article? Did you find it useful? Would you like me to answer your own, personal, gardening question? Become a Patron - just click here - and support me! Or use the Donate button for a one-off donation. If just 10% of my visitors gave me a pound a month, I'd be able to spend a lot more time answering all the questions!!

Saturday 19 September 2020

Fasciation: now it's hitting the Bindweed!!

I've written about Fasciation before -  it's a perfectly natural, spontaneous mutation (not infectious, not harmful, just INTERESTING!!) which pops up from time to time.

I've seen it on Forsythia, on Summer Jasmine, and on Hibiscus, all of which were mentioned on the post above.

Then, last week, look what I found!

This is common or garden Bindweed - technically it's Hedge Bindweed, Calystegia sepum, but this is the one that most of us will find clambering around in our gardens.

It has stout, round (usually!), stems, big heart-shaped leaves, and large pure white trumpet-shaped flowers, and it twists and twines itself all over the place, if you don't catch it early enough.

Odd little side note: most people just call it Bindweed (sometimes with something unprintable in front of it), but occasionally you'll find someone with more plant knowledge, who calls it Convolvulus.  But that's the genus for Field Bindweed - Convolvulus arvensis: and that's the one with small pink-striped flowers, growing very close to the ground. In most gardens, Field Bindweed is mostly found in the lawns, but if you are really unlucky, it will spread from the lawn to the beds. This is baaaad news, as it's very hard to dig out: the roots are slender, but go down for yards.

Hedge Bindweed - this one, above - is the one that spreads like a mad thing, tying plants and shrubs together into tangles. It is actually easier to dig out than Field Bindweed, as it has fat white roots which are highly visible once you start digging. Brace yourselves:


There we go, a lovely tangle of Calystegia roots. That kept me occupied for half an hour or so, I can tell you!


Anyway, on with the plot - do you see anything unusual about the bindweed in the top picture? Take a look at the stem, top left of the pic: no? Here's a closer look at it:


 Isn't that interesting?

Completely flat, like a ribbon, instead of being round, as it normally is.

It doesn't seem to be slowing the plant down in the slightest, as it's still doing its best to take over the back fence, and throttle the winter Jasmine.

To give you a better idea of the scale, here's a close-up - apologies for the quality:


There you go: looks as though someone has ironed it, doesn't it?!

Totally harmless, to the plant that is exhibiting this behaviour, and to other plants around it - but kinda spooky-looking!

So now we can add Calystegia to the list of plants which are prone to experience this mutation; and if you've seen it on other plants, do please send me photos, I'd love to see them.

And one final point, sometimes when I show this feature to people, they are quite horrified and ask what they should do.

The answer is, nothing! It's not harmful, it's not infections, it's a spontaneous mutation. So just enjoy the weirdness of fasciation!


Did you enjoy this article? Did you find it useful? Would you like me to answer your own, personal, gardening question? Become a Patron - just click here - and support me! Or use the Donate button for a one-off donation. If just 10% of my visitors gave me a pound a month, I'd be able to spend a lot more time answering all the questions!!

Friday 18 September 2020

How old is a tree? Count the growth rings, they said.

We all know this - to find out how old a tree is, you cut it down, and then count the growth rings.

Leaving aside the whole "but you've killed it now!" thing, we all know that trees grow unevenly - they grow more in spring and summer, and much less in winter.  So the wood, inside the trunk, appears to be different colours depending on how quickly it grew: paler, when growing fast, and darker, when growing slowly.

Last week, I was asked to lop a biggish branch off a Cercis, partly because it was unbalanced (and I do like a nice, balanced, tree), but mostly because it was blocking the view from the kitchen window.

Now, I love the chance to lop bits off trees, because I enjoy a bit of heavy-duty gardening now and again, and I don't often get the chance, these days.

Why? I hear you ask? Well, because most of "my" gardens have been in my tender care for 10, 14, 18 years, so I've pretty much done all the heavy-duty stuff that needs doing.

But every so often, I get the opportunity, and I make the most of it!

Out with the pruning saw, off it came - and look at what was revealed!

Isn't that a lovely little piggy face!

You can see that the "rings" in the cut section are not homogenous: they are not just different widths, as you would expect, but there are bands of different colours, as well.

The central core is darker than the rest of the wood - that's the heartwood, the oldest part of the branch (duh! It's in the middle - of course it's the oldest!) , but you can see, in addition, that there are two broken bands of dark colour - the piggy's eyes - and a complete ring of much darker wood, further out.

The broken bands would be from damage: it looks as though they are on the same ring, so it could be that, in that year, this branch had a couple of smaller branches broken off, or removed: or maybe the bark was damaged in two places - who knows. But it was enough to make a pair of scars on the wood. 

The darker ring, towards the outside of the section, suggests that there was a particularly bad year or years at that point, where this tree grew very, very slowly. It appears to be about 5 or 6 years ago, so what was the weather doing at around 2015? 

Well, the winter of 2013/14 was the wettest on record since lord knows when:  and that of 2015/16 was the second wettest.  But the previous July had set records for the hottest temperatures since 2003, so it was a period of extreme weather, which is hard for plants to cope with. And this is reflected in the band of very dark material, suggesting that the tree was struggling, that year. 

Isn't that interesting?


Did you enjoy this article? Did you find it useful? Would you like me to answer your own, personal, gardening question? Become a Patron - just click here - and support me! Or use the Donate button for a one-off donation. If just 10% of my visitors gave me a pound a month, I'd be able to spend a lot more time answering all the questions!!

Saturday 12 September 2020

Brambles: medicinal uses

 Now here's an interesting comment: I have written many times about brambles, and always in the context of "how to get rid of the darned things."

 Just type the word "brambles" into the Search box - top left of the page -  to see what I mean!

Recently, one of those old posts received a comment from someone asking about how to uproot a bramble in order to use the roots for medicinal purposes.

Now, you might think that that's quite bonkers - brambles? Useful? - but actually there is some small truth in it: brambles are not quite as totally useless as you might think.

For  a start, time out of mind, the fruit has been eaten: we're all familiar with blackberry and apple crumble, with bramble jelly (not often found for sale these days), with blackberry jam (if you don't mind getting pips stuck in your teeth, uuurgh!) and with just eating the actual raw blackberries.

But did you know that the stems can, believe it or not, be woven into baskets? I have to say, though, that you have to harvest them ("ouch! aargh! blood! ow!"), then strip the spines off, before you can use them, and frankly, who would bother, when there is Willow -  freely available and completely thorn-free, much easier to work with, and which gives a much more satisfactory product?

And then there's dye: the fruits can be used for dyeing fabric officially, as opposed to unofficially ruining any clothing that you wear to go blackberry-picking. Warning - if you have a go at making blackberry dye, don’t work with anything you don’t want stained – and that means, pots, spoons, your clothes - everything. Cover any surfaces that you will be working on, and watch your feet - if you drop one and tread on it, then you'll end up with purple footprints all over the carpet.

 It's not the best of natural dyes - it's a faff to work with (see comment about covering up and avoiding staining, above) and the colour is a rather insipid purple which fades over a few washes to a really insipid grey, while leaking colour all over the rest of your wash. Is it worth bothering with? In my opinion, not really.

And finally we get to the original question, can it be used medicinally: yes, blackberry/bramble (same thing) leaves and root have been used for many centuries, before Boots the Chemist was invented.

There is tons of information on the internet on how to prepare the material, how to use it, and what it's for,  so I'll restrict myself to just two aspects:

1) Getting hold of it.

Roots: If you want to extract useful material, you will need to find big strong blackberry plants, the sort that have been growing for several years, and which have formed a great big clump which contains live growth from this year, and lots of dead canes from previous years.

Chop off the top growth and discard it, and you should then be able to get close enough to dig up the whole clump.

(Obviously if this is on someone else's land, then you will need permission to dig)

Get as much of the root-ball out as you can: a pickaxe or mattock will be useful. Take a spade, and dig vertically in a circle all around the root-ball, at a distance of about a foot or so. This will sever the smaller, unproductive roots, allowing you to lift out the central mass containing the thicker roots, which are the ones you will need.

Shake off the soil, take it home, and start preparing it.

Oh, and don't forget to backfill the hole that you just made, so that no-one falls down it and breaks an ankle: and dispose of the cut-off stems properly, as they will be very spiky and scratchy. Don't leave a massive tangle of vicious branches for someone else to deal with.

 If you just want the leaves, that's much easier:  but you'll need the freshest, youngest leaves, and the best way to obtain those is to cut back a big old bramble, then go back a week or two later, and harvest the new leaves which have sprouted from the cut stems.

2) Using your home-made preparation: always be aware that using "home-made" remedies is a potentially very dangerous game.

Why?

a)  For a start, did you get the right plant? As a botanist, I can't mistake a bramble for anything else, but I've seen people mis-identify them. Anyone using any plant/fungus/natural material needs to be VERY VERY SURE that they know how to correctly identify the plant.

b)  Contaminants/weedkiller. Did you check, before you harvested your plants, that they hadn't been sprayed recently? I'm not just talking about weedkiller, although you'll obviously want to be very sure that they haven't been sprayed with those:  there's also muck-spreading to think about, and local fauna urinating/spraying onto it. Just bear that in mind.

b)  Next, variability of "strength" of the final compound. There's a reason that chemical companies charge a lot for modern drugs: the manufacturing process is tightly controlled to ensure that they are 100% certain that what they sell us contains exactly the quantity of active ingredient that it states on the pack. If you go scraping roots and boiling them up, how do you how much of the active ingredient you actually harvested? Was your chosen plant having a good year? Does it contain chemicals other than the ones you want? Do you know the correct time of year to harvest? Many plants alter their chemical composition over the seasons.

c)  Dilution: once you obtained your remedy, how much do you dilute it before applying it/drinking it? As you can't possibly know what strength your compound turned out to be - as per section b) - how will you know how much to dilute it? You could be off by a factor of 10, or 100! All modern medicines have warnings about not taking too many of them - many would kill you, if you took ten times too many of them. Worth bearing that in mind.

If at this point you are saying to yourself, well, it doesn't matter, too much of it won't harm me: then I would caution you to think carefully about all those warnings on drug packets about NOT TAKING TOO MUCH OF IT. Why do you think that a "natural" chemical is not going to harm you if you take too much of it, whereas you totally accept the concept that an "un-natural" one will?  And if you unknowingly dilute it too much, well, it won't do you any good at all, will it?

d)  Why are you taking it? Do you actually know what's wrong with you? If you have an actual illness, are you certain that you know exactly what's wrong with you, and are you quite certain that your chosen natural remedy is actually going to be the right one? There are many lovely little stories on the news about patients taking the wrong drugs, because they've described their symptoms to someone other than a proper, qualified Doctor or Pharmacist, and have been mis-diagnosed. Do bear that in mind.

Finally, when you are researching a natural remedy - and I would hope that anyone considering taking this step would do a significant amount of research - make sure that you find original sources, not modern click-bait cut-and-paste.

I'm sure  you've all heard of the current "fake news" problem: well, it's nothing new, and it applies to every single topic that the internet contains. If you are using the internet as your research source, then you MUST apply due diligence, and do a proper amount of research.

While researching your chosen remedy, make a note of how many sites use exactly the same phrases as each other: this shows that they have merely cut-and-pasted the text. They haven't checked it. And they might have missed out a paragraph or two at the top or the bottom, and that is where you usually find the warnings and cautions. Just because you can find six sites all saying the same thing, this does NOT make it "true".

When you find an original source - usually you can tell by the language that it's "old" - just check out the vast range of ailments which the remedy in question is alleged to help with, and ask yourself: do you really believe that one plant can cure boils, paralysis, hernia or rupture, scalds, scalp infections, burns, rheumatism, blackheads, venomous bites, can stabilise loosened teeth (honest!), be used as an astringent, cure piles, stop looseness of the bowels, cure "soreness in mouth and throat" (without specifying any cause for such soreness), be used as a tonic, and cure dysentery, diarrhoea, and whooping cough as well?

Then ask yourself, at the time when this original source material was written, what was the average lifespan? 70? 60? 50? 40? 30? And what it is now, with modern medicine?

So be careful, if you are thinking of trying a "natural" remedy, in case you accidentally end up dying an "un-natural" death!


Did you enjoy this article? Did you find it useful? Would you like me to answer your own, personal, gardening question? Become a Patron - just click here - and support me! Or use the Donate button for a one-off donation. If just 10% of my visitors gave me a pound a month, I'd be able to spend a lot more time answering all the questions!!

Wednesday 9 September 2020

Ivy Trees: topiary is not just Box and Yew, you know!

 Five years ago I wrote about my Ivy Tree: a piece of topiary on a garage wall. It started as just an outgrowth of unlovely ivy, but eventually I persuaded it to become a tree, much to the amusement of passers-by.


Good, eh?


Alas, a few years later the Client decided that extra water storage was more important, and the only place we could fit the new water butts, was in front of the topiary:

This kind of spoiled the point of the topiary (*laughs*), and it was going to be impossible to maintain it, as I would have to climb over and around the water butts to get to the wall - not very easy! 

So the ivy had to go: before the butts were filled, I had to move them out of the way, rip out the ivy, dig out the root, then re-install the water butts.

Undeterred, however, I turned my attention to another wall with ivy on it.


This is what I started with:

That's fairly  horrible, isn't it?

The Client asked me to stop it from getting under the gutter and creeping inside the garage, so the first job was just to cut it, a couple of feet down from the gutter, and pull off all the invaders.

This didn't take long - but it wasn't an answer, because they would quickly grow back, and I spent the next year,  doing this same job again and again.

Looking closely at the ivy, I found that originally, someone had planted a decorative, variegated ivy, but much of it had reverted back to plain old dark green: and of course in any competition between variegated (ie only part green) and fully green leaves, the branches with the fully green leaves are going to be much more vigorous, on account of having a lot more photosynthesising material than the part-white leaves of the variegated sections.

This, by the way, is why we have to keep a close eye on all variegated plants: we look out for reversion, and cut out any reverted - or "plain green" - branches as soon as we see them.

Here you can see one branch of variegated ivy on the left, among a mass of plain green.

So my first job was to cut out all the plain green stuff.

Which took me quite a while.... not least because I could only do twenty minutes at each session, as I also had the rest of the garden to look after!

Eventually, though, I'd removed all the plain, and was left with just the variegated.

Not a lot, as you can see - right.

But enough... so over the next several months, I kept an eye on it to make sure that only variegated material was allowed to grow.

As it grew, I gradually cleared off the stems, which would become the "trunks" of my trees, and allowed a bunch of growth at the top of each "trunk" to develop.

Slow work, with ivy, but a year later we were at this stage:

Not bad... but the left hand one is much too big, and it's all one big blob, whereas the rest of it is already suggesting a more Japanese-style cloud-pruned style of tree.

You can also see a lot of new bright green growth at the base: that's the  kind of thing that you have to be very aware of, and remove as soon as it regrows.

There we go, much better: I thinned out the left-hand lollipop and turned it into three separate blobs, rather than one gigantic one.

And again, note the new growth at the base - if you do this sort of topiary, you do have to keep on top of it!

I then decided that the left-most blob didn't need the lower limb at all, so off it came.

Now we are starting to get somewhere!

Over the following few months, I kept trimming back the "trunks", gradually removing all the foliage from those sections, and only allowing growth on my "clouds" or pompoms. 

Then it had a bit of a set-back: I missed it off the schedule for a couple of months, while we were doing some big projects in the garden: installing raised veg beds, moving plants around, new trees: all sorts  of interesting things.

But this meant I didn't have time to pop out and check the back of the garage.


Oops! And there it was, back up to the gutter again, and trying to get inside the garage.

Time to give it a stern talking-to!

Twenty minutes later, peace had been restored:


Ah, that's better! 

It wasn't as bad as it looked.. well, it was, but it didn't take me long to get back to where we were.

So this is pretty much the finished article.

Or is it?

Topiary is never quite finished: I find there is always something more to do.

A year later, I decided to finesse the left-hand blob just a little bit more, and here is the current state of play:


There, I think I can be proud of my copse of cloud-pruned trees, don't you?


Did you enjoy this article? Did you find it useful? Would you like me to answer your own, personal, gardening question? Become a Patron - just click here - and support me! Or use the Donate button for a one-off donation. If just 10% of my visitors gave me a pound a month, I'd be able to spend a lot more time answering all the questions!!

Monday 7 September 2020

Sempervivum in flower!

 I'm not a great fan of Sempervivums or Houseleeks: they are very slow-growing, and they just don't satisfy anything within me, as a gardener or as a Professional Gardener. I suppose they're ok in gravel-filled butler sinks (said she, grudgingly) but in the garden, in general? No thanks!

But then, the other day, while at work, this happened!


Isn't that amazing?

 I still don't value Sempervivums very highly, but at least now I do appreciate that they might have something to contribute to the garden - even  if only for five minutes!


Did you enjoy this article? Did you find it useful? Would you like me to answer your own, personal, gardening question? Become a Patron - just click here - and support me! Or use the Donate button for a one-off donation. If just 10% of my visitors gave me a pound a month, I'd be able to spend a lot more time answering all the questions!!

Saturday 5 September 2020

How much damage will Buddleia do to a fence: and vice versa!

Earlier this year, in February, I had to cut down a rather over-large Buddleia, one which had set itself somewhat too close to the fence.  
 
The neighbour was complaining, apparently, so the Client asked me to drastically reduce it early in the year, in the hopes that the regrowth would be a lot smaller, and wouldn't draw the ire of the neighbour.

It's a valid complaint, I have to say: really, Buddleia needs to be chopped down to about knee height every year without fail, to keep it looking neat and tidy. Otherwise it just grows bigger and bigger every year - and this one was actually a "weed" in the sense that it wasn't planted there deliberately, it had self-set. So you can understand why the neighbour had been moaning, and I therefore got out my pruning saw and started work.

Once I'd cleared off most of it, I could see the back fence: lo! and behold, there was a ducky little wooden picket fence there as well, which had been completely covered up by the exuberant buddleia.

When I got to the very back-most branches, this is what I found: 

Can you see that the picket fence to the left of the upright branch is mostly greeny coloured, but there's a raw bare patch at the top?

That's where the stems have rubbed it, while flapping about in the wind.

And when I cut off that stem, much lower down, and turned it around.....


This is what I found!

The buddleia had been crushed against the fence for so long that it had formed into a ridge around the top of the fence: and it had also worn away part of the wood! 

So the lesson here, boys and girls, is that shrubs and trees should never be planted this close to fences, because they damage each other.

As a gardener, I care mostly about the plants: but as a householder, I can also sympathise with the fence!!

If you have any Buddleia in your garden, keep an eye out for the many, many seedlings which they produce, and be ruthless: dig out any which spring up right at the backs of borders, because if you don't, this is what will happen.

If you catch them early enough, while they are still tiny, you can replant them elsewhere in the garden, or you can pot them up and give them away later: but it's better not to let them choose where they plant themselves, as apparently they are not very sensible!


Did you enjoy this article? Did you find it useful? Would you like me to answer your own, personal, gardening question? Become a Patron - just click here - and support me! Or use the Donate button for a one-off donation. If just 10% of my visitors gave me a pound a month, I'd be able to spend a lot more time answering all the questions!!

Friday 4 September 2020

Weeping Pear: Cathy has a big one!

Recently, Cathy added a question to my article about Weeping Pear tree pruning, she inherited an old one, and it's getting a bit too big for the space.

She asks if it's possible to cut it right back to the thicker ‘main’ branches.

They love the tree, and they are worried that if they cut too much, it might kill the tree.  

I asked Cathy for photos, and she's kindly sent me a couple. Here is the tree in summer:


It's a lovely one, as you can see: but it is also just a bit too big for that space.

You can see where Cathy - or a former owner - has chopped off the bottom branches in a rather pudding-bowl style: not the most elegant of presentations!

I find this a lot, because it is hard to know how to prune a weeping tree - and this is precisely why I started writing this blog, to show people how to do these gardening tasks which never seem to be mentioned in gardening books.


Demonstrating rare intelligence, Cathy also sent me a picture of the "inside" of the tree, which is perfect - it shows how congested it is, and it show the matrix of branches which these trees develop.

I know that Cathy wants to reduce the sideways spread of the tree, but I'm going to start by suggesting that she does some thinning out first: as per the article mentioned.

Why? Well, if you look at this photo - right - you can see that none of those branches are straight and simple: they are all congested, twirly, intertwined,  and generally knotted together.

This means that reducing a weeping Pear is not as simple as just lopping off a couple of branches.

So I would suggest firstly, get up inside the tree, stand on a step if you need to: and cut out every dead twig you can find. 

If you are not sure if a twig is dead or not, circle it with your finger and thumb, and run that hand down and down and down  to the end: if you encounter foliage, then it's alive. If you don't, cut it off, as high up as you can.

Now look at the outer fringe of branches: instead of giving it a pudding bowl haircut, take each of the lowest branches in turn, and  shorten them according to the instructions in this article - it's about miniature weeping willows, but the principle is the same. Scroll down through the post to the little cartoon of how to do what I call the "undercut", which preserves the waterfall shape while thinning and shortening the branches.

Then stand back and take another look.

Without the dead material, it should be a lot thinner and lighter-looking: and with the tails properly trimmed, it should look more natural and less pudding-bowl-like. 

Is that enough? It might be....

If not, assess the tree from the front and decide where the particularly thick, dense areas are. Get an assistant to take hold of a branch in that area, then go inside the tree, and trace back that branch to where it leaves the main trunk, or where it joins a really thick branch. 

The reason for doing this, is that weeping Pear branches clamber around all over each other, and if you don't start at the "outside", as it were, you might cut off a branch on the left, only to find that you now have a big hole on the right!

Once you are happy that you have tracked the branch back to the source, carefully cut it off. You might need to cut the branch in several places, in order to get it out of the matrix without damaging the rest of the tree - don't just yank it out. 

Then step back and take another look, and repeat as many times as necessary.

By doing this, you will gradually reduce the tree, without ruining the overall shape, and without having any disasters along the way. Hopefully!

Once this work is done, the tree will grow more branches to fill any gaps - where you have allowed the light in, new branches will grow.

So the proper answer to Cathy's question is yes, they "could" cut it right back to the main branches, but doing so would spoil the lovely waterfall shape, and might well leave it very unbalanced: you can see from the "inside" photo that this tree has one huge old branch coming to the right, and two going to the left, so cutting right back to those big branches would leave a very odd shape.

In addition, weeping Pear are usually grafted trees, so too much pruning, ie the removal of very old, thick branches, might well prompt a spate of new shoots from below the graft point, which would be very undesirable.

I am fairly confident that even an over-large tree can be reduced quite substantially by just taking out the dead wood,  trimming off the tips, and maybe just thinning out a couple of medium-sized branches. Hopefully, it would not be necessary to cut it all back to the main branches.

So there you go, Cathy, that's your project for the weekend!


Did you enjoy this article? Did you find it useful? Would you like me to answer your own, personal, gardening question? Become a Patron - just click here - and support me! Or use the Donate button for a one-off donation. If just 10% of my visitors gave me a pound a month, I'd be able to spend a lot more time answering all the questions!!