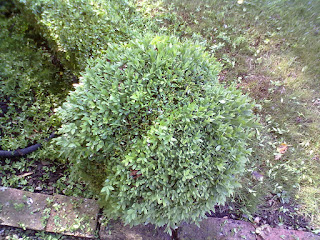
However, many people struggle to clip them, and I am always being asked how I do it: like much of gardening, it's easier to demonstrate than to describe, but today, with the help of a lot of photos, I am going to try to show you how to clip small box balls.
First step, start to cut a channel up, over, and down, circumnavigating your ball, from pole to pole, as it were.
It doesn't matter whereabouts you do this first cut, just do it wherever it is comfortable for you to get to it.
As you can see, I am reducing this rather fluffy ball by a couple of inches.
Step 2: the first cut is done, all the way up, over and down.
If your balls were pretty much the right shape to start with, all you have to do is cut a constant amount off: just follow the existing shape, and all will be well.
The only "trick" with balls is to ensure that you keep the "bulge" or roundness - don't ever clip "downwards", always go outwards.
Step 3: make another line of clipping, from the north pole round to the south.
Step 4, predictably, is to complete step 3 all the way over and down.
Now you have an outline to aim for.
Step 5, cut the first quarter.
By cutting pole-to-pole channels first, you can see roughly where you need to go, and it prevents you starting at one point, going all the way round and then finding out that you are not in line with where you started, which can be disastrous.
Step 6, clip the next quadrant.
At this point, I am clipping fairly closely, but not obsessing about getting it perfectly smooth or perfectly even: these cuts are all about getting the general shape, size and proportion correct.
Step 7, third quadrant done.
Step 8, all four sections have been done.
Now is the time go back and even out any lumps and bumps.
Stage 9, there, much better. Looking at this photo, I can see a couple of slight angles which need a little smoothing over, and it is always worth gently fluffing it up with a hand, to shake loose all the clipped leaves, and to find any odd uncut stems that would otherwise pop out as soon as you walk away, spoiling the effect.
There is no need to get it absolutely 100% perfect - as soon as you step away from it - right - it suddenly looks completely wonderful.
And of course, within a week it will have a batch of new leaves, which will hide any discrepancies and will quickly fill any small gaps.
Having finished the clip, it's important to clear up all the debris, shaking the hedge gently to get out the loose material, and scraping it all away from underneath both the hedge and the ball.
This is to help prevent box blight and other assorted diseases: closely clipped hedges are often susceptible to disease, as there isn't much air circulation within them. You can help prevent these problems, by always clearing debris away when you clip, and by keeping the root area clear, so that air can get in.
The final job, after clearing away the mess, is to give the topiary a good watering, and a balanced liquid feed, as the pruning will prompt it to produce a new flush of leaves to replace the ones I have just cruelly removed, so the least we can do is to give it some encouragement.
Did you enjoy this article? Did you find it useful? Would you like me to answer your own, personal, gardening question? Become a Patron - just click here - and support me! Or use the Donate button for a one-off donation. If just 10% of my visitors gave me a pound a month, I'd be able to spend a lot more time answering all the questions!!


No comments:
Post a Comment
Comments take around 2 days to appear: please be patient. Excessive SPAM has forced me to restrict comments to just Members: if you have a question, you can become a Member: or you can hop over to Patreon and join me there: or you can email me direct - my email address is in the right-hand pane. Sorry about this, but honestly, the spam! I'm drowning in it!!
Note: only a member of this blog may post a comment.