This is going to be a bit of a specialist article, only really of interest to Scythe-Nerds!
Yesterday two of us went on a scything course with Clive Leeke : one of us had never used a scythe, and the other one (me) was very aware of having picked up lots of terrible habits over the last 6 years, and was therefore not keen to teach the other, so as not to pass on those evil habits.
So we went off to Sonning Common for the day, and one of us learned, while the other re-learned.
The most interesting part of the day - for me - was a chance to re-learn the skill of peening, which is something I haven't needed to do, so I'd forgotten all the details.
Peening is the act of hammering the very edge of the blade, to "draw down" or "stretch out" a bit more of the metal, in order to create a new cutting surface. It is done when the edge becomes chipped or damaged, or has been honed ("sharpened") so many times that the razor-thin edge has been worn away.
So we peen down a bit more metal, from the bulkier part of the blade, to get a bit more wafer-thin metal which we can then hone.
Simple, huh?
I was beginning to wonder if my own blade was due for peening, as I have been using it for the last six years without cease... and my friend Jon, from Canal Club, was wondering the same, because his blade was quite battered. Neither of us were quite brave enough to peen our own blades, so he lent me his battered one to take along to the course, in the hope that we would be able to peen it for him.
For those of a nerdish disposition, all the blades shown here are 65cm Ditch blades.
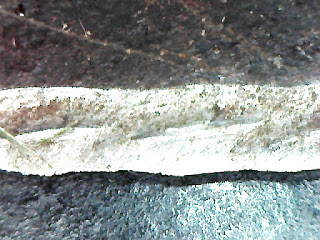
Now we get to the nerdy bit: here are a long sequence of photos of the cutting edges of our blades, as seen under high magnification. I took the first set of photos because I wanted to see if there was a discernible difference between my own, current, blade, and my spare back-up brand-new, never-used blade.
So let's start with them. On with the nerdery!
In all these photos, we are looking down on the blade, the top edge of the photo is heading up towards the rib, the bottom edge of the photo is the cutting edge. And, as they appear in sequence, I was starting at the beard and working out towards the tip.
First set: my own, current blade:
My interpretation: quite a nice, straight, consistent cutting edge. No major nicks or dings. Better than I had thought it would be: but what would Clive say? Well, on arrival, he pronounced my blade to be super-sharp, so I was well pleased.
Right, now here's my new, un-used blade for comparison:
To my surprise, not hugely different. This blade had, on arrival, been peened and honed (along with my other one) by my friend Jim, who is very much an expert on such things. So it does not have a perfect "factory finish" but is, as it were, ready for use.
I think the main difference between the two, is that my blade in use, shows a lot of diagonal markings from honing.
Now we turn to Jon's blade: this is what it looked like when he dropped it off:
Overall, pretty straight along the bottom, I thought: not as bad as you would have thought from looking at it, if you see what I mean. There is a definite progression: the first photos are at the beard end, and the cutting edge is pretty straight. Then we get to the main working part of the blade, and there's a bit more wavyness going on. Then there is the one almighty ding, quite close to the tip.
Ok: brace yourselves! Here's Jon's blade again, after the course: peened, and honed, and tested.
Now you can see the fresh, shiny new metal which has been peened - or "stretched" - off the blade, to form a new cutting edge, thin enough to be honed and made super-sharp.
I am sure that a better peener would have made a more even job of it, but it's not bad, for a beginner, and already it is a lot less wavy, and most of the smaller dings have now gone, as new metal has been brought down to fill the gaps, as it were.
Even the Big Ding is better than it was: Clive explained that we could, had we wished, have removed it entirely, by peening more metal down around and over it, then filing off the excess to get back to a straight cutting edge. But as this ding is situated right up by the tip, he said it was not worth spending a lot of time and energy in doing "advanced peening" on it, when it was not on the part of the blade which did the majority of the cutting work, particularly as "advanced peening" carries a risk of cracking the blade, which would be bad: so that level of remedial work would be better carried out by someone more experienced than us.
One point of interest for scythe-nerds, and for myself and Jon, was Clive's comment, on first seeing Jon's blade, was that, despite all the wavy bits and little dings, it was still super-sharp and very effective.
Does that mean that it didn't really need to be peened? Well, technically, yes: while the blade can still be honed, and while it keeps that sharpness for a reasonable time, you don't really need to peen. But it was good to get the dings out, and I am sure that Jon will be glad that he's put off the awful moment of having to peen, for another few years!


