Pages

Saturday, 31 October 2015

The KleenSweep Broom - Fail

It's time for another biting product review!

Recently, I asked one of my Clients if they had an old outdoor broom that I could leave by the compost bins: the path leading to the area is lower than the soil level (I'm working on changing it!), and the loose soil falling across it is unsightly, as well as making my boots muddy every time I walk over it - which means I then track the mud across the lawn on my way back.

Last week, a new broom appeared. A brand new broom.  Oh dear, I was hoping for an ancient one, as it is going to be left outside.... well, never mind, I will tuck it under the hedge and hope that it survives.

The label says Kleensweep, a tacky americanism that sets my teeth on edge every time I see it, but luckily the label is already starting to peel off.


It has a pair of rather strange twisted metal struts to hold the head on, never seen anything like that before: but it should make it sturdy.

The bristles are rather weird as well - normally a broom has the bristles pointing slightly backward, so that when you sweep away from your self (the normal thing to do) they are already oriented correctly.

On this broom, however, the bristles seems to be pointing directly downwards, which means that every time I apply the broom to the path, it "bobbles" around for a second, until the bristles lean into the sweeping action. This is very strange, rather uncomfortable, and I sincerely hope that with time and use, they will "settle" into pointing one way or the other.

That, however, is not the worst thing about this broom.


Here's a picture of the broom - right.

Looks pretty normal, doesn't it?

Ah, but looks can be deceptive...
Here it is again, leaning up against the wall with several other tools.

Spot the mistake?

Yes, it is a good three bricks shorter than the others, and about two foot shorter than the hoe on the far left.

It's barely a foot longer than the forks and spade!

This makes it almost-but-not-quite-entirely useless as a broom: you can't sweep more than a foot or two away from yourself, or you lose hold of the handle! I nearly fell over the first time I used it - I started to sweep some leaves away from myself and there it was, out of reach!

What sort of idiot makes tools with teeny tiny short handles like this? It's not aimed at children, or very short people, it was sold - apparently - in a perfectly normal garden centre.

Worst of all, because of the metal bracing, you can't easily just put a longer handle on it. And why should you have to, anyway? *annoyed huffing*.

So, boo to "Kleensweep" and their Epic Fail Broom, and I shall be sweeping the path in tiny little arcs, for the rest of my time in this garden...

Wednesday, 28 October 2015

The Tale of the Smothered Acer or: How To Remove Ivy From A Small Tree: Part II!

I started work in a new garden last year, and I was intrigued as to what this was:

Clearly it was a small ornamental tree, the bud arrangement suggested that it was an Acer, and the size indicated that it was a Japanese Maple.

However, it was mostly covered with ivy, and was pretty well swamped by a massive, encroaching, ball of Box.

The first job was obviously to get rid of the ivy - always an unpleasant task, but on the other hand, I quite cheerfully detest ivy for many reasons, so there is always a certain amount of pleasure to be derived from getting rid of the stuff.

I started at the top, carefully unwinding the strands of ivy from what did indeed prove to be a small tree. When doing this, it's important not to just impatiently rip the stuff off, as by doing so, you might well damage the plant underneath. Even though it's a tree, it is still quite easy to inadvertently snap smaller branches.

So, gently does it, unwinding the stems, and as they come free, snipping them off into short lengths, taking care not to cut any part of the tree beneath.

After a short time, this appeared:


Impressive, huh?!

Yes, it's a Japanese Maple, and look - it's a rock! I had no idea that underneath all that ivy was a lovely old rock!

And  what a lovely windblown curve the stem has formed!

The tree, who was probably now screaming "Don't look! I'm naked!" seemed to be mostly undamaged by the experience, despite being pushed right over.

Annoyingly - well, to me, at any rate - previous gardeners hadn't taken the time to clip the monstrous Box ball, but had allowed it to smother this dear little tree.

I can't imagine why anyone would do this.

So that would be the next job - radical chop for the Box, but not just yet - I would rather wait and see if the Acer survives before I start altering the other plants. It would be very annoying to slaughter the box, only to discover that the tree is actually a dead one, particularly as the trunk of the little tree was revealed as being quite damaged. Also, this initial work took place in March, and I would rather not cut Box quite that early in the year, in case a frost comes along and ruins all the new growth.

By May the little tree was leafing up beautifully, so I went ahead with modifying the Box.

What you can't see from this angle is that the Box ball also encroached on the path to the left of the photo, to the point where people had chopped out a section of it in order to get past.  This makes a mockery of clipping it into a ball shape, with a great big lump missing out of the side of it... so I had no compunction about removing well over 2' in all directions, in order to reduce it to a size that would not encroach on the path, and would not interfere with the newly-revived Acer.

This does leave a lot of very bare stems, but they are one of those trees - like Yew - that will "break" from old wood, which means that when the bare inner stems are exposed to the light, they will produce new growth. Most conifers, famously, don't do this: once you cut back into old wood, they remain stubbornly brown and ugly for evermore, until the owner can't stand them and has them removed completely.

And no, I  don't know why the expression is to "break",  other than the way we say that a plant has "broken into bud".

Here we are in May:  lots of leaves on the tree, and a newly-chopped Box, much reduced in height, width and depth.

Two months after this photo, the Box had greened up quite nicely, in case you are worried!

So now I am a happy gardener again: the dear little Japanese Maple survived the experience, and we are now able to see it, in its full glory.

And it is quite glorious!


Did you enjoy this article? Did you find it useful? Would you like me to answer your own, personal, gardening question? Become a Patron - just click here - and support me! Or use the Donate button for a one-off donation. If just 10% of my visitors gave me a pound a month, I'd be able to spend a lot more time answering all the questions!!

Wednesday, 21 October 2015

Garden Review: Westwell Manor, Nr Burford

This is a garden open under the NGS Open Gardens scheme, which I visited earlier this year.

As an aside, I was talking to someone the other day who spoke at length of their dislike of the NGS, mainly - it seemed to me - based on class resentment. They had tried to deal with an NGS local organiser, I can't remember exactly why (they did tell me, but frankly I was losing the will to live after listening to their lengthy complaint), and were left with an impression of a lot of hooray henrys who were completely inefficient and seemed to treat the whole thing like an old boys club, quite removed from the real world.

Well,  I have met my local NGS organiser, and she's lovely, despite having a double-barrelled name, so I don't quite agree with their complaint: I've also been to many NGS garden openings, and usually they are a treat, a chance to see round a garden that is not normally open, and a chance to see a "real" garden, with real weeds, real neglected corners, and one which is used by real people, which can often be more interesting than the sometimes rather sterile National Trust type of garden, where they employ numbers of volunteers *grits teeth* (I have strong views on this subject) and where nobody actually "lives" in the garden.

However, sometimes you find one that is annoying: the Mill House in East Hanney is a good example, they opened a few years as one of a small handful of gardens in the village, participating in an NGS day. At the entrance there were three utter hoorays, sitting in the shade of their parasol and braying - "hwah! hwah! hwah!" is the nearest I can get to conveying the noise - to each other while ignoring us, the paying visitors. The garden was tiny, and mostly filled with a gigantic industrial cable-reel, I'm not sure if it was supposed to be a table, or a Feature. Weeds were abounding, good planting was not. It took less than five minutes to see the entire "garden", then we had to troop back past the owners, squeezing past some incoming visitors as we did. I very nearly wrote to the NGS to complain. But I didn't.

Westhall Manor was very nearly as annoying: firstly they had completely and utterly failed to make any arrangements at all for car parking. Every verge in the village was littered with cars, listing at dangerous angles and ruining the grass, as it had been very wet in the days preceding, and was drizzling as we arrived. Despite this, the visitor numbers were huge: the Manor was surrounded by gates and tracks leading to empty fields, yet they had done nothing about parking. It felt like one of those situations where the lord of the Manor "owns" the entire village and can steamroll any tentative complaints about insensitive car parking or ruination of front gardens.

Having parked on a verge way, way out of the village, and hiked back, we were greeted by a queue to get in, and the traditional trestle table with three people stood there, but only one person taking money, and no sign to tell us how much the entry was. The queue was formed by each person having to ask "how much is it?" and being told £6 (or whatever it was - it seemed quite high) then having to rootle around in their purse. In fact, it was worse than that, as the publicity in the local paper had stated the entry fee, but incorrectly, so there were people presenting the right money, being told that it was more, which caused embarrassment, and confusion while people hunted for more coins, having put away their wallets and purses in the sure and certain knowledge that they helpfully had the right amount to hand.

Having paid extra for a map of the gardens - which I consider to be a bit of a liberty - we were firmly directed to the next trestle table, where they were selling bottles of wine. I don't think they had produced it themselves, I didn't see any sign of a vineyard or a bottling facility, so presumably they had struck a deal with a local wine merchant? Who knows. Who cares?

So now we come to the map: having had to pay extra for it - yes, I'm still annoyed about that - we had certain expectations. It was nicely printed, on very good quality paper, and seemed to be based on a rather wishy-washy colour-pencil drawing or plan of the garden. It was dated 1996... oh dear, they've been using the same map for the last 20 years? Perhaps they had thousands of them printed, and have been working their way through them ever since? Bit of a cheek to charge money for it, don't you think? Twenty years old and somewhat out of date, as there were elements of the garden completely missing from the map, not least being an entire section containing a tump, and what was presumably supposed to be a wildflower meadow of considerable size.

However, that was not the last of the annoyances of the map: they had made the obligatory list of named features, designed and intended to encourage visitors to see all of the garden, and to navigate between places of interest. So far, so good - apart from being out of date, to the point where the tennis court (of little interest) had been replaced with a beautiful reflecting pool (very much of interest). But instead of using simple numbers, or even letters, as a key, they had chosen to use roman numerals.

*Sigh*.

How many people, in 2015, use roman numerals on a daily basis? How many people, for that matter, under the age of 40 would even recognise them? This struck me as so pretentious as to be laughable, and we spent the whole visit saying the numbers as they were spelled, ie "Shall we go and have a look at Eye Vee now?"  "Why yes - let's cut past Ex Eye and round Vee Eye Eye."  It was surprisingly difficult to work out which one was which, not least because they were all hand-drawn, and whoever did it was having to squeeze three symbols into a place where the single digit "7" would have been easier, simpler, and much clearer to read.

These initial impressions did somewhat taint my view of this garden, and it won't be one that I ever return to.

However, if you don't mind inadequate parking and pretentious presentation, do go there some time, if only to have a schoolboy snigger at their idea of stylish and classy topiary:


It is simply not possible to call this "garden room" anything other than "The Big Willy Garden".


And, just to make it even worse, the entrance to the Big Willy Garden is via a narrow slit in the hedge, towered over by The Big Boobies.

This poor lady clearly has no idea where she is standing.
Elsewhere in the garden we found such treats as this one: is it a new rockery, is it a mini wildflower "urban meadow" recreation, or is it - as we suspect - an overgrown weed-infested old concrete terrace?

At this point in our visit, I was approached by a rather irate woman, flapping her map and demanding "where is the tennis court, then?"

I  pointed to this feature - right - which clearly used to be the tennis court.

"Hmmph," she replied "That's not much good for playing tennis on, is it?"

I have no idea why she was so huffy about it: who would want a boring old tennis court in their garden when they could have a reflecting pool instead?  Maybe she had heard about the rather clever terracing or banking that had been constructed around the "other", presumably newer, tennis court, and wanted to see it? We had found it, incidentally, but only by being nosy, as it wasn't on the map.

And so to the actual reflecting pool - was it better than the tennis court it replaced? Well, yes, but it could have been done a lot better: take the one at Kiftsgate, for example. That one is stylish, elegant, interesting, and amusing.

This one, in my opinion, is a bit dull: for a start, it's too big, as they seem to have felt the need to take up the whole area of the tennis court, and as it stands, it is not inviting to walk all round it. In fact, I'm not sure that you can. Furthermore, although it is raining in the photo, so reflections wouldn't work, even if the water were still, what exactly is it reflecting? Green hedges. Hmm.

My final comment on this garden concerns the vegetable garden, or "Ex-eye" as they call it.

Can you see the climber, working its way up the chicken wire netting of the fruit cage? At this time of year, the leaves are dying, but the fruit is ripening nicely.

Can you see, on the left, those bright red berries?

Red berries, in a fruit cage.

Good?

Not so much - the climber is White Bryony, Bryonia dioica. The berries are poisonous.

Just saying.

Thursday, 15 October 2015

How to deal with tree roots in the lawn

Tree roots in the lawn?

Yes, you know - when a nearby tree has sent roots all the way across the lawn, and some of them are sticking  up through the grass, causing anguish to the owner of the mower, as the blade goes "Scccrrrrrrrr!" every time they try to mow over the protruding root.

Here's one I was asked to deal with earlier this year: I forgot to take a proper "before" shot, so:


...here is the lawn with the scalped root protruding, with my secateurs for scale.

Take an edging iron or a small border spade (as I am using here) and cut a slot about an inch deep, in a square, all around the root. I have done three sides of the box here.

Do the same as when you want to lift a turf - having made the slot, push a small border spade under the grass, about an inch down, and slide it sideways under the grass, loosening the square of turf.  Try to keep it all in one piece if you can.

Having done that, here is the turf peeled back and laid to the side. You can see the hole where the root was!

Now you can tackle the root or roots - cut them off with loppers, digging around them with a small hand tool as necessary.

It doesn't hurt the tree to do this - if the roots are in your lawn, then by definition they are sufficiently far away from the tree that it will have many more to support it. Also, a root that has projected above surface level will be dry and possibly dead anyway: and one that has had a mower regularly scalping it will almost definitely not be of much use to the tree any more.


This gives you an idea of the quantity of root that you might find under the lawn - one projecting section is usually quite literally the tip of an iceberg! While you are at it, you might as well remove any roots that are already at surface level once you have lifted the turf, as they would no doubt be rising though the turf within a year or so anyway.


Right! All the roots are out, I have added in some soil to fill the hole I made, and trodden it down well so that it won't sink the next time someone walks or mows over it. Aim to make the ground slightly higher than the original ground level, just in case.

The next job is to get the watering can, and to make the newly-trampled soil good and wet, and to wet the underside of the lifted turf flap as well.

Then, turn the flap back over into place (cries of "Green side up!" from behind me) and tread it down well, then water it from above.

Here is the replaced flap - above - with my daisy grubber indicating where the root used to protrude. I added a small handful of grass seed to the hole, to encourage it to fill in as quickly as possible.

Job done!  


Did you enjoy this article? Did you find it useful? Would you like me to answer your own, personal, gardening question? Become a Patron - just click here - and support me! Or use the Donate button for a one-off donation. If just 10% of my visitors gave me a pound a month, I'd be able to spend a lot more time answering all the questions!!

Tuesday, 13 October 2015

How to remove a gigantic Buddleia that is in the wrong place.

How many times have I been asked to deal with this problem?

"Lots", of course.

Buddleia are little devils for seeding everywhere ( a single plant can produce a million seeds, apparently), and the seedlings are so neat and innocuous that they are often overlooked by the garden owner. They also employ the cunning strategy of flowering really early in their lives, and the flowers are so lovely, and attract so many butterflies, that the garden owner is usually delighted to see them, and allows the plant to grow on.

And here lies the problem: when we plant something in our gardens, we choose where to put it, somewhere suitable for the eventual size of the plant, somewhere where it won't outgrow its welcome, but the self-set buddleia often plonks itself in entirely the wrong place for a large, fast-growing shrub which requires heavy-handed cutting every year.

Last week I was asked to dig out a Buddliea which had become massive, to the point where the Client couldn't see out of their window.

First job: get the loppers and take off as much of the top growth as you can, and get rid of it.

Second job: get the bowsaw, and saw the trunks down to about knee height. Make sure to take off as many side branches as you can - the idea is to be able to work all around it without being poked in the eye every five minutes.
 
Here is my stump, after initial clearing: there is one main trunk, on the left, and two smaller ones on the right, which were probably separate seedlings.

When you get to this stage, get out the knee pads or the kneeler, and a small trowel and small hand-fork or Daisy Grubber, and start excavating. Dig out a shallow bowl all around the roots, heaping the soil back out of the way - there's nothing more maddening than soil continually falling back into the hole you are trying to dig!

Once you have exposed the roots, you can see what you are dealing with.

In this case, the right-hand two stumps were easily severed with loppers, having gone down three bricks-worth in depth. They won't grow back from this depth.


With those two out of the way, I can now see the main stump more clearly.

As you can see, it's far too big to chop off, so I have to excavate a bit more.

However, I don't actually have to dig much deeper, I just have to clear all the soil away from the roots. Use a hand fork, or my favourite tool, the Daisy Grubber, to "pick" away all the soil.


You might be surprised to see how much soil comes away, and how what appeared to be a solid, massive root ball is actually only a central lump, supported on three or four thickish roots.
Here's a closer view of the very base of this stump, and now you can see that there is a "cave" underneath it: it's not solid at all.
To prove it, here is my Daisy Grubber, poking in past the big right-hand root and out the other side.
..and here it is, doing the same thing to the left, where there are just two roots holding the stump in place.

The loppers made quick work of those three roots: cut as low down in the soil as you can, and they should not resprout.

I don't know if you can see it clearly, but I have dug down three bricks-worth below the original soil level, so there is little chance that these roots will grow again.

Here is the stump in it's full glory, along with one of my gloves to give some sense of scale.

As I said, it's a massive stump, but it's not actually a massive root - just three main thickish roots, all of which were simply lopped off once I had removed enough earth to be able to see them clearly.

All that is left is a collection of root stumps.


Here is a barrow load of stump, and roots. Phew! Job done!


Hmmm, well not quite "job done" as I now have to fill in the hole, and refresh the soil by bringing in a barrow-load of our home-made compost, then digging over the whole area to de-compact it.

Then, next week, I can plant the new roses!


Did you enjoy this article? Did you find it useful? Would you like me to answer your own, personal, gardening question? Become a Patron - just click here - and support me! Or use the Donate button for a one-off donation. If just 10% of my visitors gave me a pound a month, I'd be able to spend a lot more time answering all the questions!!

Sunday, 11 October 2015

Patios: how and why to hand weed them

Oh, such a familiar story - the patio is covered in weeds, there are terrible things growing up between the slabs, it looks awful, it's horrible to walk across as the willowherb and grass tickle your ankles, and what is to be done?

Most people turn to weedkiller as being the easy answer, but when your weeds have reached the ankle-tickling stage, it is the wrong thing to do.

Why?

Because although the weedkiller will kill off the plants, that is not the whole story: the dead plant matter will fall back to the gaps in the slabs, adding to the rich organic mix down there, and providing the perfect germination and growing medium for yet more weeds. No to mention having to look at the brown and dying corpses for weeks or months.

Long-term weedkillers such as Pathclear are designed to kill off top-growth and to prevent new seeds germinating: but if you use it on "big" weeds, only the outer shell of the plant is coated with the chemicals, meaning that all the soft inner tissues are "clean" and, as plants generally rot from the outside first, these clean inner tissues form a good organic layer on top of the "you can't germinate here" layer. Perfect for new weeds.

And if you use glyphosate-based (translocated) weedkillers, well, one of their biggest selling points is that they are inactivated on contact with the soil, so once they have killed the weeds, the remaining plant matter is almost by definition a good seedbed.

So what is the right answer? One of the those flame-wands, with a gas canister and a long handle? I should say not, despite them being marketed as being eco-friendly: I just looked at one that proudly stated "Environmentally friendly; no hazardous chemicals".  No nasty chemicals? How can any grown adult not see that a flame wand is made of a pressurised aerosol can, fuel (butane), metal tubing, ignition devices,  safety devices, plastic handle etc etc - how can you not see just how non-eco these items are to make? How many chemicals, processes, how much energy was used in producing these things?  And it's not even the one-off purchase of the tool - you have to keep buying new canisters of fuel for them, and in my experience they are not particularly effective, either: they may well scorch off the top growth, which is slow but satisfying to do,  but the weeds quickly grow back as their roots are inevitable undamaged, so most of these toys end up collecting dust and webs in the shed, which is so incredibly wasteful.

No, the only real answer is to get out there and pull the weeds out by hand. Not what you were wanting to hear, but truly this is the only way to do it properly.

Here's one I'm halfway through doing... as you can see, square slabs, quite wide channels between them, filled with pea shingle, and also filled with weeds, including grass, willowherb, sedge, lavender, cinquefoil, and alchemilla mollis (*groans theatrically*).

Put on your knee pads, get yourself a narrow tool - the good old Daisy Grubber being my first, last and best choice - get a bucket for the bits, and start weeding.

Start in one place, at random: take hold of the top growth in one hand, and poke the Daisy Grubber down between the slabs. Wiggle it around until you feel the plant start to move, then pull gently and steadily upwards to ease out the entire plant, including roots. If you just pull them, you will snap off the top growth but leave the roots undamaged, meaning that they will grow back even bigger than before, so it is very much worth the effort to get them out undamaged. And it's actually quite satisfying, when you succeed in getting a great long length of root out in one piece!

Move your way along the crack, clearing every weed as you go. When you reach a join, it doesn't matter which way you go, as long as you are steadily clearing out all the green matter. Put all the debris into the bucket or trug as you go, to reduce the amount of clearing up to do afterwards, and to avoid accidentally pushing dislodged weeds back down into the cleared channels.

The earlier groaning, by the way, about Alchemilla is due to the very strong, solid roots that this plant creates: it's a horrible job to remove it from cracks in paving and in steps, and over the years I have found that the trick is a) to catch them while they are tiny plants and easy to remove, and b) - yes, I said trick, but actually there are two parts to this trick - to use the Daisy Grubber against the actual slab to lever them up. Stab the forks down into the roots of the Alchemilla, as far "underground" as you can, then lever it out. If it snaps, repeat the process, stabbing and wiggling and levering until you can get the whole clump out.  If, however, you've inadvertently left it too late, and they are solid lumps of root, the only answer will be to apply glyphosate -based weedkiller, wait until they go brown and die, then lever out the remains, which will hopefully shrink away from the sides of the slabs as they die.

If you have loose pea shingle between the slabs, this is a bit of a pain: shake off as much of it as you can from the roots, while trying not to get too much soil back amongst it:  then when you have finished the weeding, scrape it back into the channels, then sweep any last bits away. If you only have earth between the slabs, dig out the earth as well, to a depth of about an inch, in order to get out all the scraps of root, and all the waiting seeds.

Once you have done all this, you should have a clear patio with clear channels round each slab. Spray carefully along each channel, or each crack/join if you don't have channels, with Pathclear. This is the weedkiller which prevents germination.

Then fill the channels with either sand, or a fresh layer of loose pea shingle. Spray the channels again with Pathclear.

This should allow you a good 6 months of weed-free patio - a whole year, if you are lucky. Just keep an eye out for new growth, and keep a small spray-bottle of glyphosate handy, to spritz any green bits as soon as you see them.

Then, hopefully, you won't have to spend another afternoon bend double! 


Did you enjoy this article? Did you find it useful? Would you like me to answer your own, personal, gardening question? Become a Patron - just click here - and support me! Or use the Donate button for a one-off donation. If just 10% of my visitors gave me a pound a month, I'd be able to spend a lot more time answering all the questions!!

Wednesday, 7 October 2015

How to: coppice Catalpa

Actually this goes for Paulownia (Foxglove Tree), Eucalyptus, Liriodendron (Tulip Tree), Aesculus (Horse Chestnut) and anything else that you need to keep small for convenience, or in order to get the largest or prettiest foliage.

All you have to do is take a deep, deep breath, and chop the top off.

It's best done in late winter or early spring, just as they start to bud, for several reasons: firstly, by pruning just as the sap is rising, all the energy of the plant will go into making new growth straight away, so that your fresh cuts don't have time to rot, or to allow infection in. Secondly, if you allowed the tree to grow for several weeks before pruning, you will have "wasted" all the energy that was pushed into the new leaves, thus draining the tree unnecessarily. Thirdly, you can see within a week or two whether your pruning has been successful - or not.... Fourthly, doing it without it being covered in leaves means you can see what you are doing more easily. Lastly, without leaves, there is less of it to dispose of!

I have some Indian Bean Tree (Catalpa) saplings which I have grown from seed, intending to plant them out when I get a bigger garden. There is no sign of me moving, but my seedlings are growing and growing, and are now nearly as tall as I am.

So last year I decided to coppice them, they grew on beautifully, and now it is time to coppice them again - once you start, you have to keep on doing it, as you have, in effect,  "ruined" their natural form, and to get them back into a natural shape would require some intensive training.


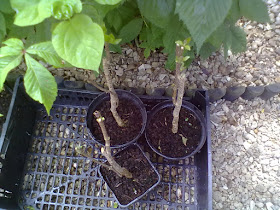
Here they are back in May: Catalpa are very late starters.

Four saplings, each has already been cut before, at about a foot above the ground.

Pruning usually produces multiple branches, and you can see on the far right-hand one that the cut from last year is only a couple of inches above the ground, whereas the others are all much higher up the trunk.

Regardless of how low or high you start,  each year I prune each of the new-growth stems back to about an inch or so above the growing point.

The idea is that each cut will then make two (or more) new branches, so gradually they will build up a bushy head of foliage, without being forty feet tall.


Here we are on June the 17th - you can see that the left-hand one - which was the middle one in the photo above, sorry, I have turned the tray round and sold off one of them since May - is putting out good leaves, while the other two, which were cut much harder, are just making small leaves.
 

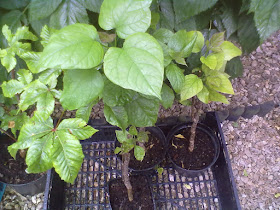
By June 28th, we have good growth on all of them, although the one at the front  is lagging behind a bit, probably because it is overshadowed by the larger one.


And here they are in the first week of July, sprouting very nicely.

So there you are, proof that drastic pruning does not necessarily kill things, and a nice illustration of the strange fact that coppicing a plant often induces it to produce leaves that are much larger than you would expect, for the given height at which they appear.

This can be particularly dramatic with ornamental trees such as the Foxglove Tree (Paulownia) whose heart-shaped leaves can be almost a yard across, if you coppice it to waist or head height.

So there you are, that's how it's done: deep breath, be brave, and chop!

Monday, 5 October 2015

Field Guide to Wild Roses

Hot off the presses, here is the latest Field Guide:


This one deals with the differences between Dog rose, Field rose, Sweet Briar, and Burnet rose, with Rosa Rugosa thrown in for free  - to anyone interested in gardening, that last one is dead easy to identify, as it is a very popular garden plant: but it is escaping into the wild more frequently, so there is a chance that budding botanists might encounter it in hedgerows and get confused.

As always, these Field Guides are not intended to replace "proper" botany books, but are meant to focus on one group of plants at a time, summarising the differences between members of the group in an easy-to-read, easy to carry around format.  I strive to simplify, without dumbing down: you will find proper botanical terms in these books, but they will be explained clearly.

They started out as memory aids for myself, but were quickly adopted by anyone who saw them (I was forever having them "borrowed" and having to chase after people to get them back before they went home with them!) so it seemed sensible to get them all into a format where the general public could benefit from the information.

So how do you get it? Go to Amazon, go to the Kindle Store, and type "Rachel the Gardener" into the search box. That will give you the whole list of all the books I have published to date.

Or, follow this link direct to the Field Guide for Wild Roses.

Then, if you have Kindle Unlimited or Amazon Prime, you can download it for free: and don't worry if you don't have a Kindle, you can download it to any ebook reader or tablet, and you can even download it straight to your pc or laptop: Amazon kindly provide a free "app" (or "programme" as we grown-ups call them) allowing this.

And if you don't have Kindle Unlimited or Amazon Prime,  wait until next weekend, 10th/11th October, when I have made them free to download for everyone.

Then you can rush out into the countryside and start looking for wild roses to identify!

Let me know what you think of it, and if you like it, do please leave a Review on Amazon, as user reviews are really helpful for people who think it might be yet another dry, dusty old botany book, not realising how helpful and interesting it is (she said, modestly!).

Saturday, 3 October 2015

Cherry tree with damaged bark

How's this for a triumph of nature over adversity?

I saw this poor cherry tree earlier this year - which you can tell, obviously, as it is covered in spring blossom - and was so astonished at the damaged bark that I just had to stop and take a photo of it.

Incredible, isn't it?

The bark has opened up more than half-way around the trunk, and I honestly can't see what is keeping this tree alive, but I assure you that it is still in full leaf today, first week in October.

Cherry trees are not particularly long-lived:  20 to 30 years for ornamental or flowering cherries seems to be about what you can expect.

And, as ornamental cherries go, this one is fairly substantial, so I suppose it might be nearing the end of its lifespan.

Will it survive another winter?

Will it flower again next spring?

I guess we will have to wait and see....